Power Automate enables Excel users to create automated workflows across various applications in a low-code environment. This post will discuss how to automatically update an Excel workbook each time an RSS feed is refreshed.
RSS feeds deliver regularly updated web content, such as news or blog posts. By automating the addition of rows to an Excel table with each update, data analysts can continuously monitor and analyze trends without manual input. This automation facilitates real-time insights and rapid decision-making, leveraging Excel’s powerful tools and familiar interface to simplify data visualization and manipulation.
Power Automate vs Power Query for data collection
Astute readers might consider Power Query the go-to tool for integrating various external data sources into Excel. However, RSS presents unique challenges that make it less straightforward to work with. Power Automate is more adept at importing RSS data into Excel, as it handles real-time, event-driven integrations seamlessly. It can automatically process and update Excel with RSS feed data as it occurs, ensuring timely data updates. In contrast, Power Query is better suited for batch processing and requires manual refreshes, which makes it less effective for dynamic RSS feeds. This underscores Power Automate’s superiority in managing live data feeds and Power Query’s utility in scheduled data extraction and transformation.
Learn more about the key differences between Power Query and Power Automate in this blog post:
Setting up the base table
The first step in setting up this workflow is to create the Excel table where the results will be stored. I plan to include columns for the date posted, a summary of the new RSS item, and a full link, naming the table something like bbc_rss (We’ll be reading in data from the BBC’s RSS feed.).
This process can feel a bit like a chicken-and-egg scenario, as it’s challenging to predict the exact data format from the post until the flow is built. However, constructing the flow requires an existing table to house the data. Therefore, you might find yourself iterating on this setup a few times.

Building the cloud flow
Next, ensure you save this workbook in a OneDrive location associated with the account you will be using with Power Automate, and then visit make.automate.com. Here, we’ll create a new flow, specifically an automated cloud flow. This means the flow will be triggered by a designated event. In this case, the event is an update to the RSS feed.

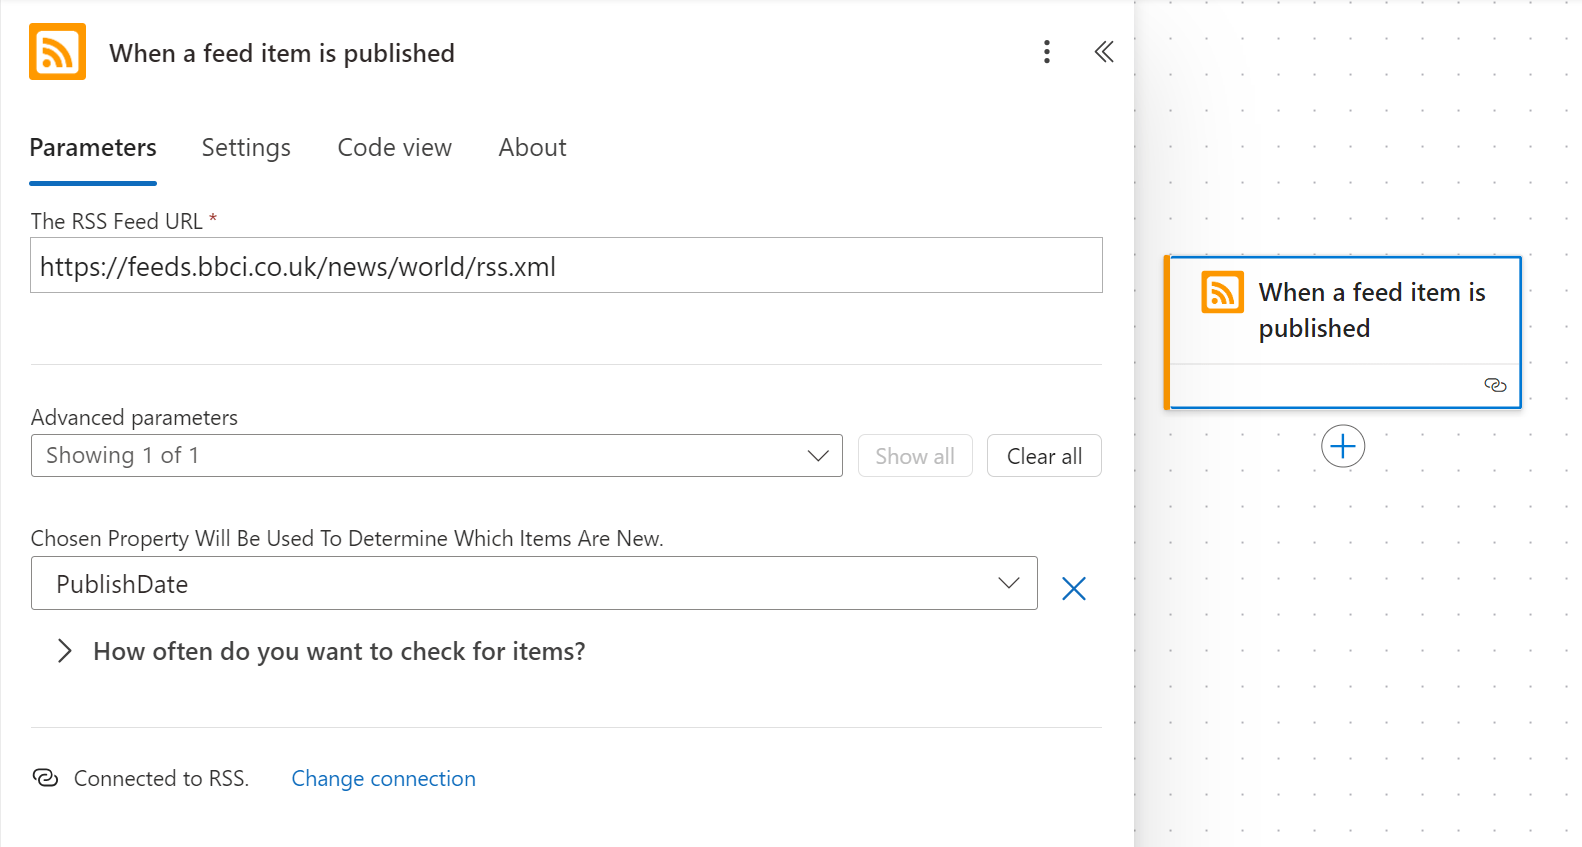
Next, search for RSS to find the trigger that will initiate this flow. You’ll see an option that specifies “When a feed item is published:”

To ensure we select an RSS feed that updates regularly and reliably, I will choose the BBC World News RSS feed. The URL is provided below. Please copy and paste it into the RSS Feed URL field in the flow parameters:
https://feeds.bbci.co.uk/news/world/rss.xml

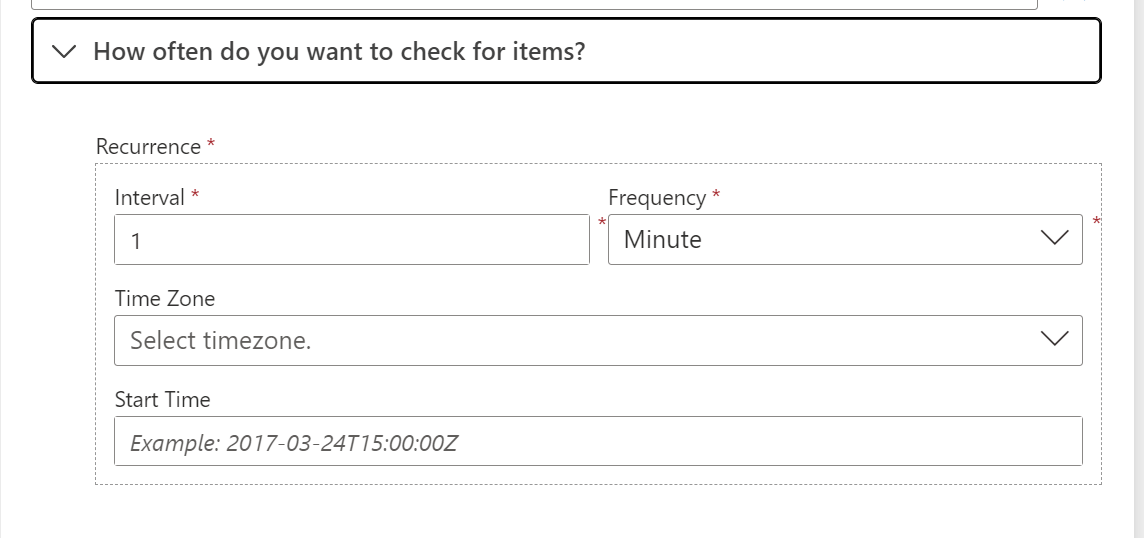
Next, under “How often do you want to check for items?” I’m going to set mine to update every minute—I’m a bit impatient! You can configure it to check as frequently as every 15 seconds. The BBC World News feed updates fairly often, so it really depends on how frequently you want to check for updates.

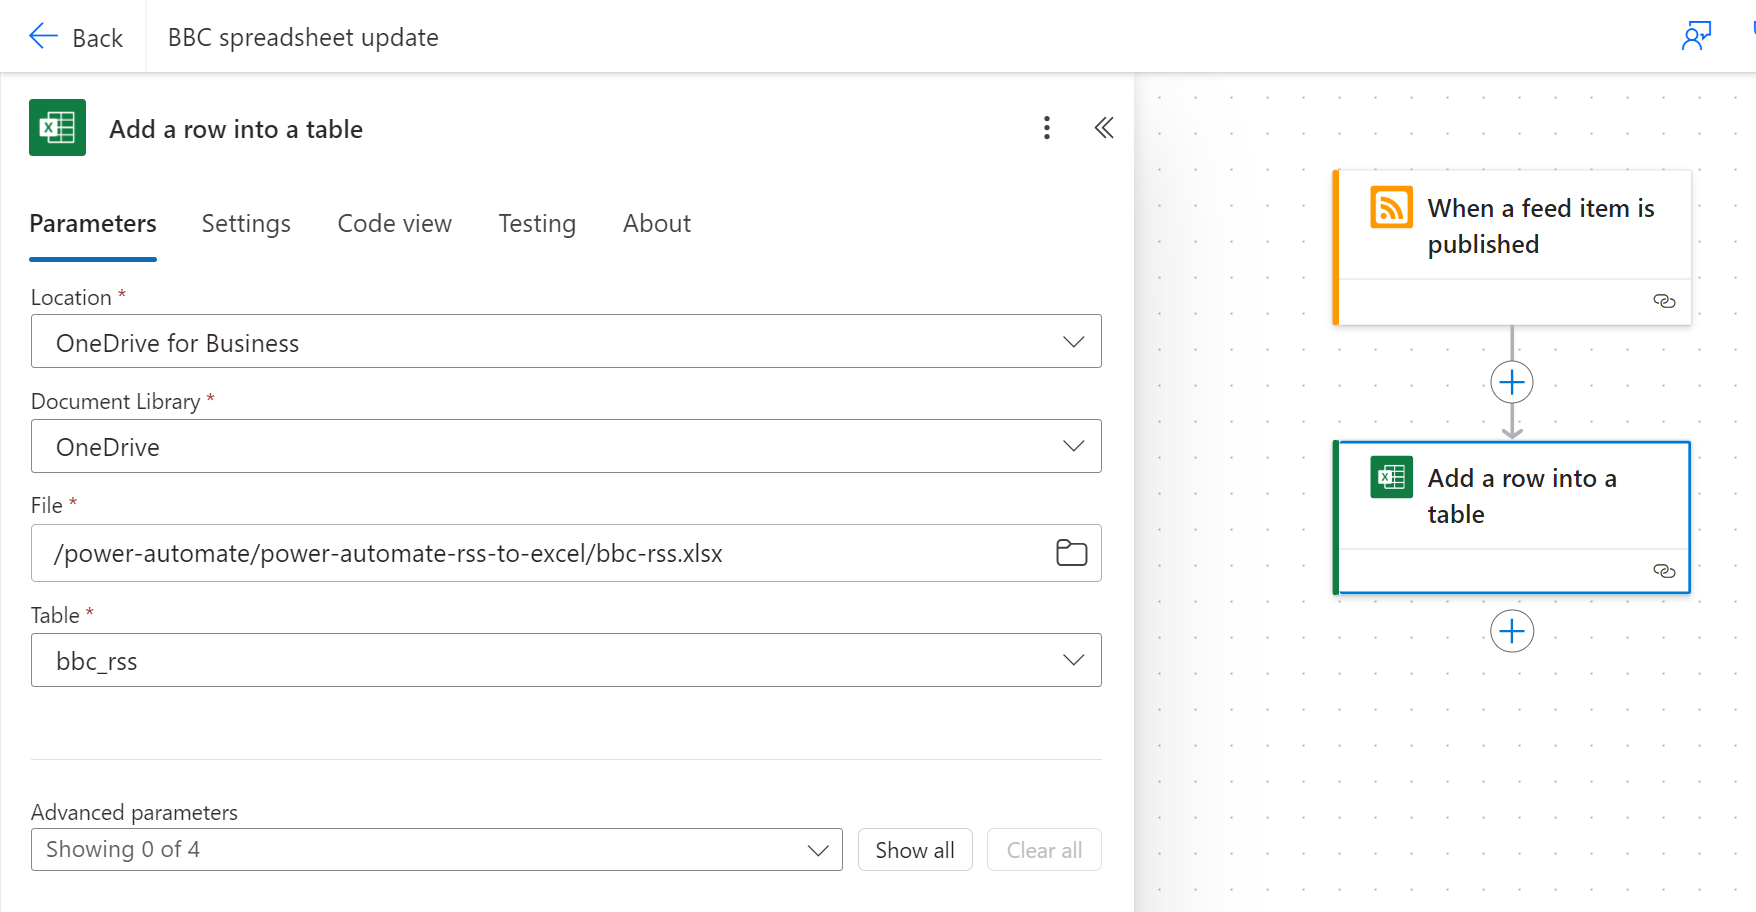
Great work setting up the check for the RSS feed! Our next step is to specify what should happen when a feed item is published. Naturally, we want this data to be entered into our workbook. So, add a new step to this flow and search for “Add a new row into a table.”
Next, you’ll need to search for the document library, file location, and table name where the RSS holder table is located. Excellent!

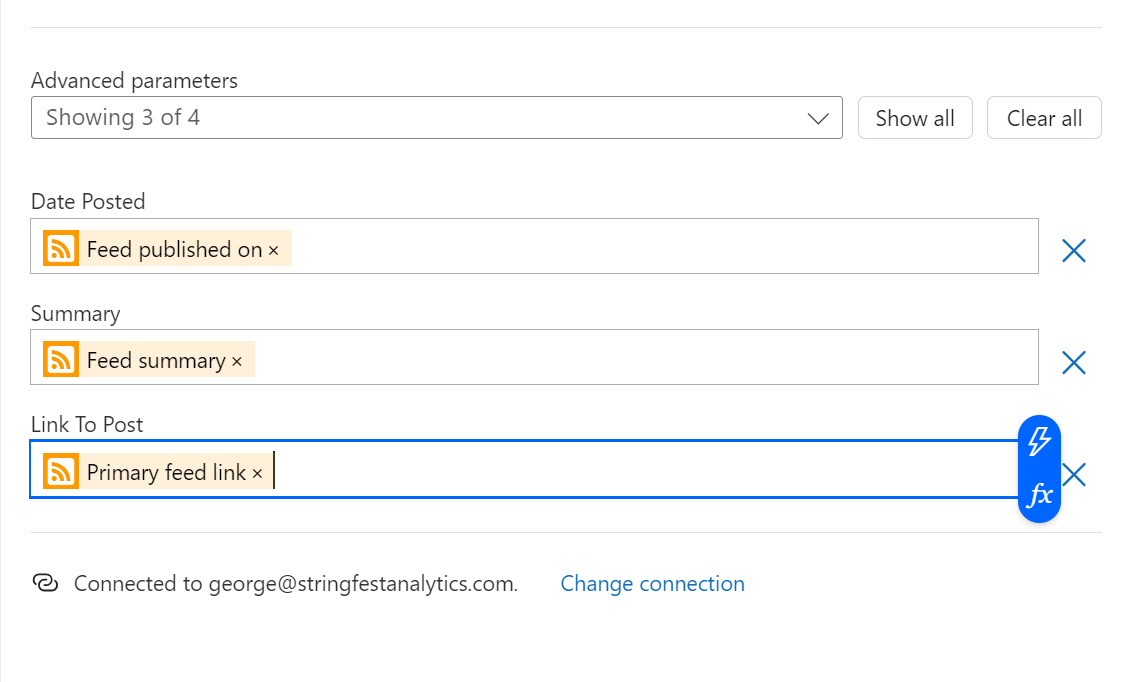
Next, we’re going to configure some parameters to specify where each piece of returned data should be placed in the table. Click on the dropdown next to “Advanced parameters” and select Date Posted, Summary, and Link to Post. Start with Date Posted.
Click the lightning bolt icon in the text box to reference the dynamic content created by the previous step with the RSS feed. We’ll place “Feed published” on into this cell. You may need to select “Show More” in Power Automate to expand the available options.

Next, assign “Feed summary” to the Summary column and “Primary feed link” to the Link to Post column. Great work!
Finally, don’t forget to save your work!
Testing the flow and viewing the results
Now that you’ve set up this flow, you’re probably eager to test it out! Unfortunately, since this is an external flow, there’s no immediate way to input data and see if it works right now. Luckily, this feed updates frequently, so you shouldn’t have to wait too long.
For instance, I set up this flow in the evening, and by the next morning, here’s what I found. You might notice some articles are posted twice; this indicates that the article was updated—after all, it is breaking news.

If you want to double-check that your flow is working, especially if you haven’t seen any results after several hours, revisit Power Automate, navigate to your flow, and examine the 28-day run history for any errors. If you encounter errors, consider reading this article for troubleshooting tips: Troubleshooting Power Automate.

Conclusion
In conclusion, Power Automate’s capability to seamlessly integrate and automate data collection from various sources, like RSS feeds, highlights its strength in facilitating real-time data analysis directly within Excel. This empowers data analysts to focus more on analyzing trends and making data-driven decisions rather than on the manual process of data collection.
Whether you’re looking to track news articles, blog updates, or any content distributed through RSS, Power Automate ensures that your Excel workbook is continually updated with the latest entries, enhancing your analytical capabilities without interrupting your workflow.
If you have any questions about setting up your own automation using Power Automate for Excel or if there are specific scenarios you’d like help with, feel free to ask in the comments below. Let’s automate smartly and save time with Power Automate!
