
As analysts, some of the more interesting, personal, and important data we might gather could come from surveys, and using Microsoft Forms is a great way to easily create and share those surveys. We can even port that data over pretty easily into our data tool of choice… Excel! Let’s take a look at the default way to do this and one that’s a bit more complex using Power Automate.
To get started, let’s create a form about coffee consumption for an office. Head over to forms.office.com, and with the Copilot prompt below, you should be able to quickly set up a fun, easy coffee consumption report for a very caffeine-centric office.

Once you’ve finished that step, add a couple of test entries to get the hang of retrieving them. Office has already made the easiest way to view this data available for you. To check it out, simply click on “View responses” located at the top of your Forms editor.

You’ll now notice a button at the top that lets you view the results directly in Excel!

Go ahead and open it; this will establish a live connection that allows you to authenticate and refresh the form data. It’s very user-friendly. By default, these responses are stored directly in your Documents folder.

If you’re looking to set something up elsewhere, your best option is to use Power Automate. Let’s go to make.powerautomate.com and get started. With Copilot now available to assist in creating flows through natural language, we can give it a try here:

When a new response is submitted for my Coffee Consumption Report on Microsoft Forms, automatically add the details to a new row in a table within an Excel workbook.
You want to be very precise with this prompt. Specify the tool exactly (otherwise, it might confuse Microsoft Forms with something like Google Forms!), mention what triggers the action (like a new response), and so on. We could be even more detailed by telling Excel exactly where the target table is located, but we’ll cover that in a moment.
Click “Generate” to start the process, and you should see a flow similar to this one.

If you don’t, you might want to rerun the prompt or manually construct it, as we’ll need to configure several inputs and parameters anyway! Here’s the basic concept: when a new response arrives, Power Automate captures the details and adds them to a new row.
Ensure you’re connected to the correct services, namely Forms and Excel, and then proceed to create the flow. You should see a visual representation of how this three-step process will function:
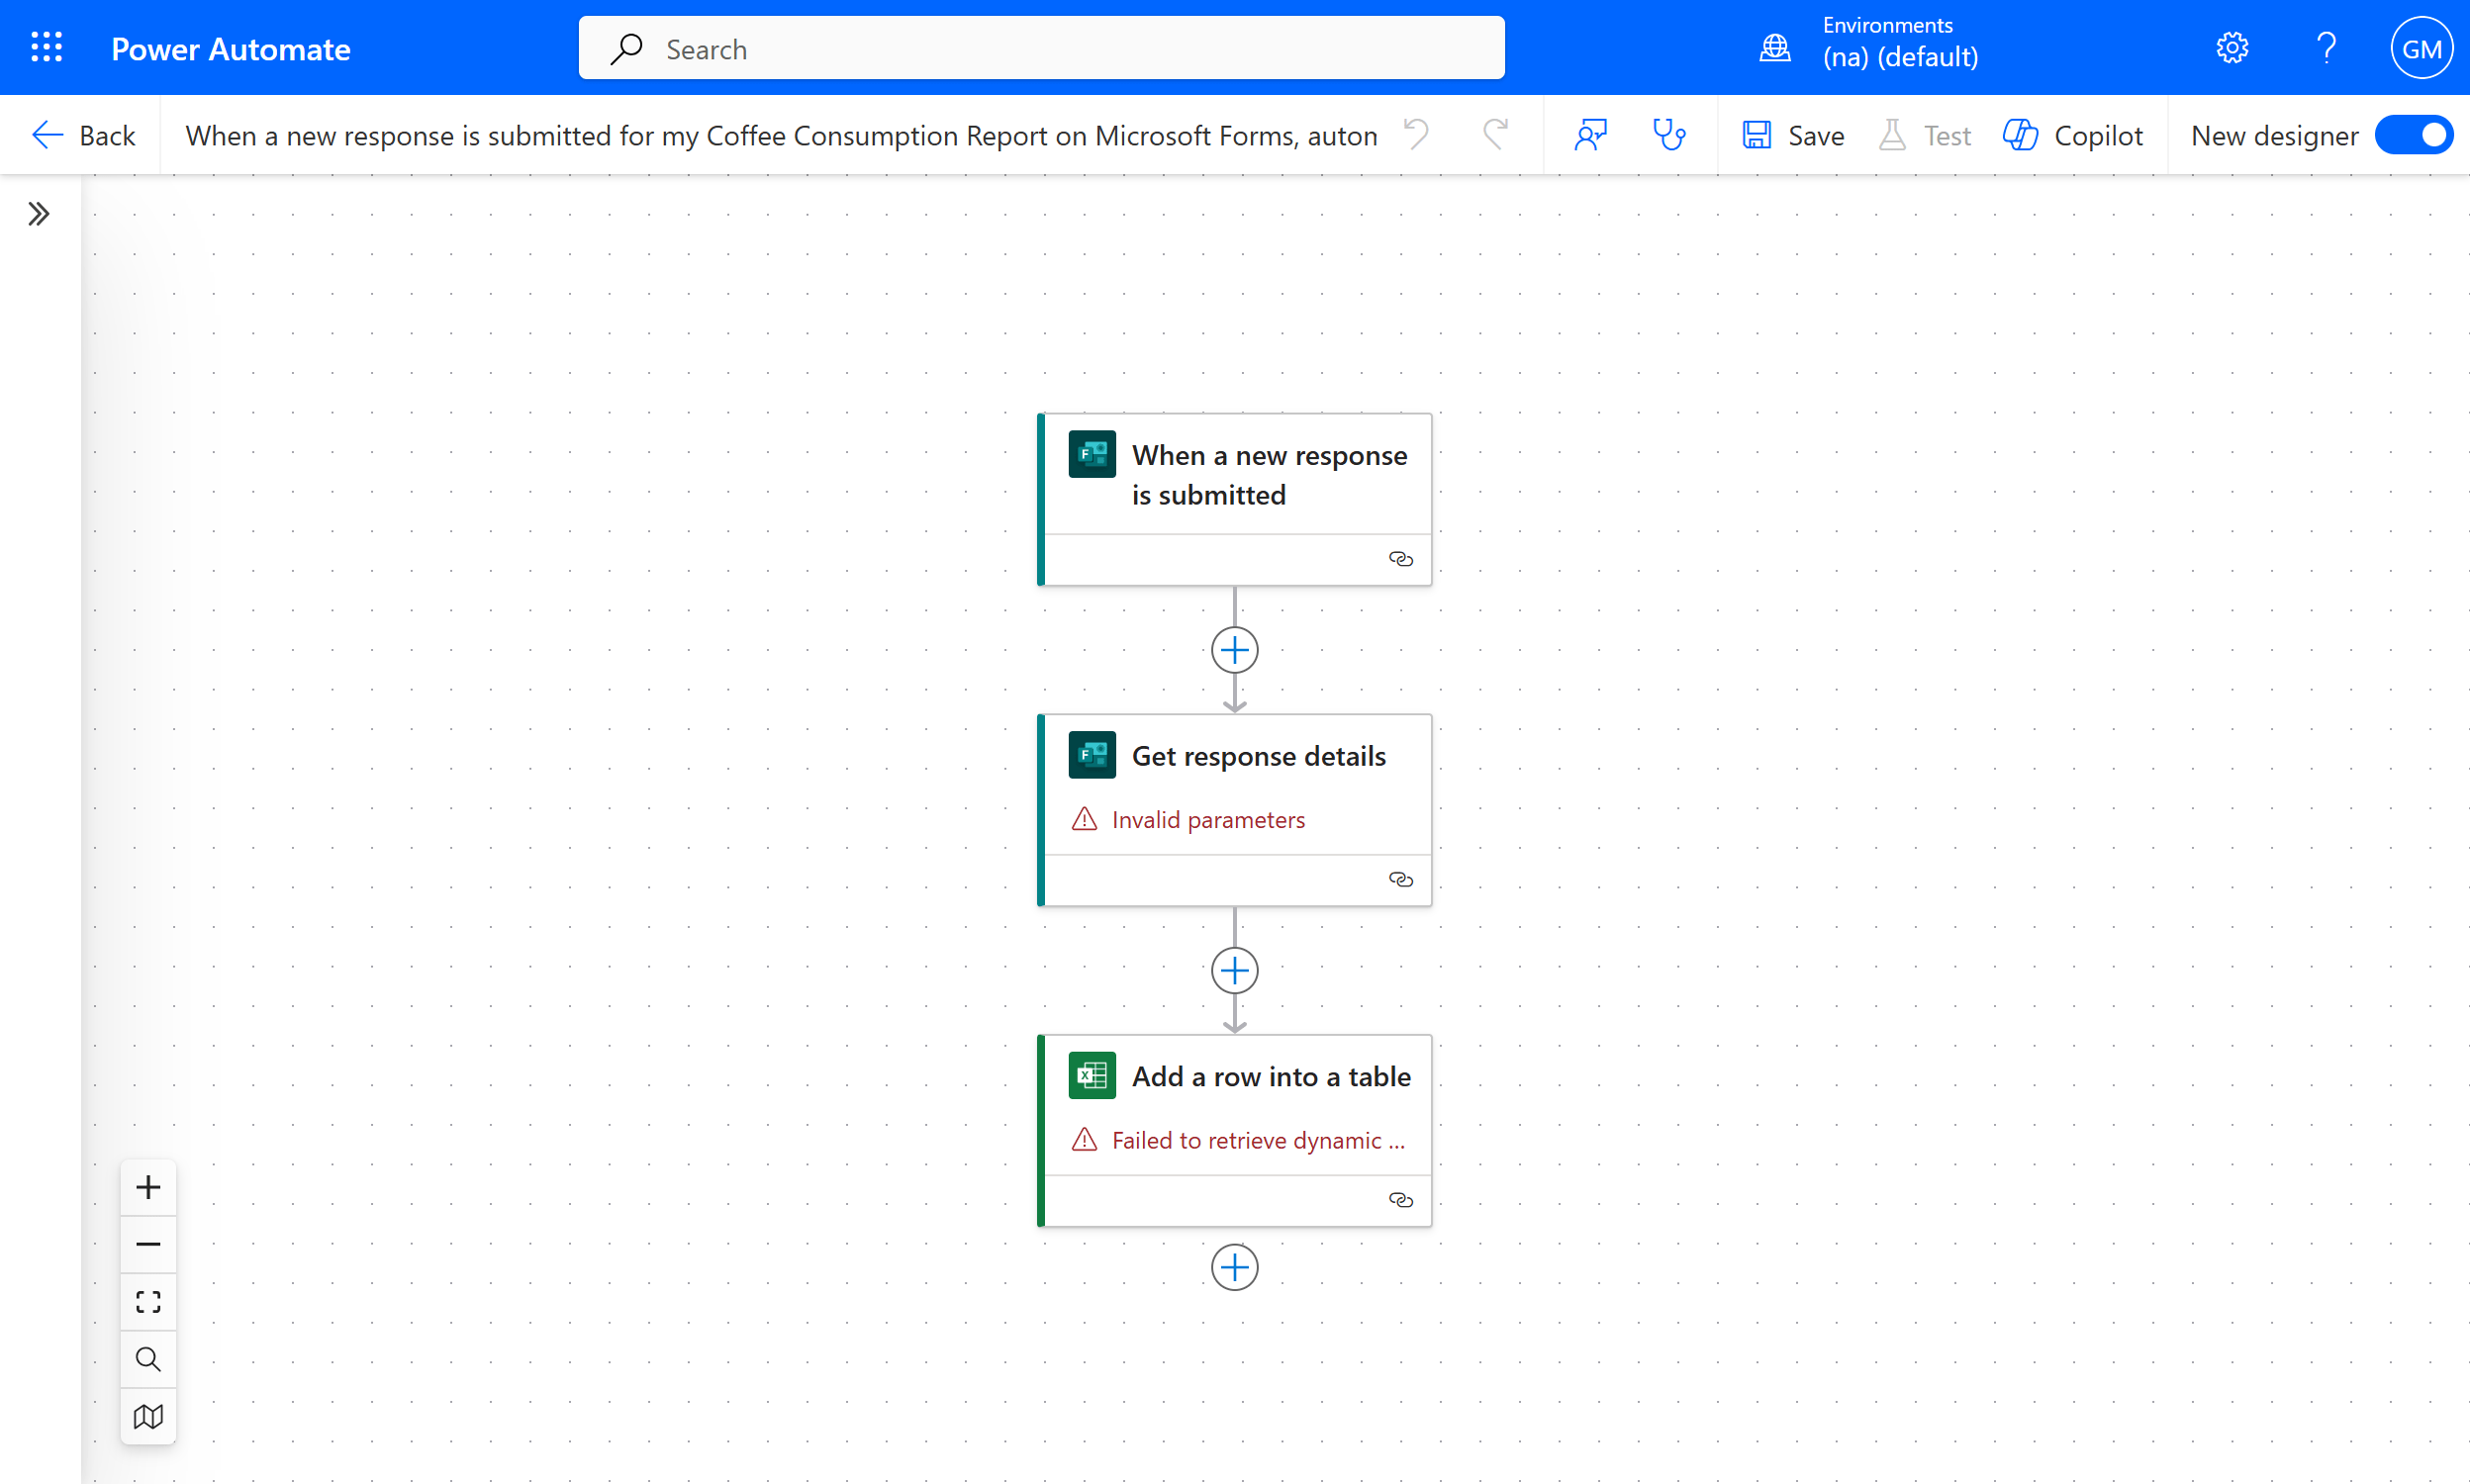
To get started confirming your inputs click on the card for the first step, “When a new response is submitted.” Even if the Form ID entry form is prepopulated I’d suggest backing out of what’s in there and redoing it via the dropdown menu. It’s too easy for there to be small mismatches in the name of the actual form you want, for example I want a “Weekly” coffee consumption report which I failed to include that word in Copilot.

Next, click on the “Get response details” card and follow a similar process. You’ll need to specify which form you’re extracting the details from. Consider this: someone filling out the form is one action, but retrieving those response details is a separate step that happens once the form is submitted.

To proceed, we need to determine where to place this table in Excel. First, set up a new table in Excel that looks like the one below. You can download a blank template here. Once you’ve created the table, upload it to your OneDrive for the next step!

Additionally, make sure that the Response ID is correctly set as the response ID; this is the primary key used by both Forms and Power Automate to distinguish one entry from another on the backend.
Finally, click on the last card to add the data to the Excel table. The initial step is to direct Power Automate to the correct file and table. If you encounter any warnings about this step failing or not being found in Excel Online, you may need to manually delete this step from Power Automate and then re-add it.

Now, let’s configure the parameters. This step is crucial for mapping the Form results to the Excel workbook. Click on “Show All” and then proceed to remove the “DateTime Format” option.
The next step involves mapping each piece of dynamic data to the appropriate column in the Excel table. Click on the lightning bolt icon within each text box, then select the corresponding piece of dynamic content.

Nice work! Save your flow, then head to Forms and submit a test entry to test the flow! You should see these results get automatically added to your table.

In this post, we’ve discussed accessing and retrieving responses from Forms, covering both basic configurations and more complex setups with Power Automate.
What questions do you have? How have you managed to integrate Forms data into Excel, and have you used Power Automate or other tools to enhance this process? One potential application could be merging the initial form results with additional data collected during an approval process. I’ll provide a link below for an example of how this can be achieved using these tools. Feel free to share your questions and experiences in the comments.