Microsoft’s Power Platform offers Excel users an accessible and powerful gateway to build workflows, websites, and even applications within a low/no-code environment that seamlessly integrates with numerous data sources, including Excel itself.
In this blog post, we’ll explore how to use a premade template in Power Automate to create a basic clock-in/clock-out tool that logs data directly into Excel. Utilizing the Power Fx programming language, we’ll demonstrate how to retrieve data from previous steps and format the outputs effectively. To get started, open a blank Excel workbook and ensure it’s saved to the same OneDrive or SharePoint account associated with your Power Automate license.
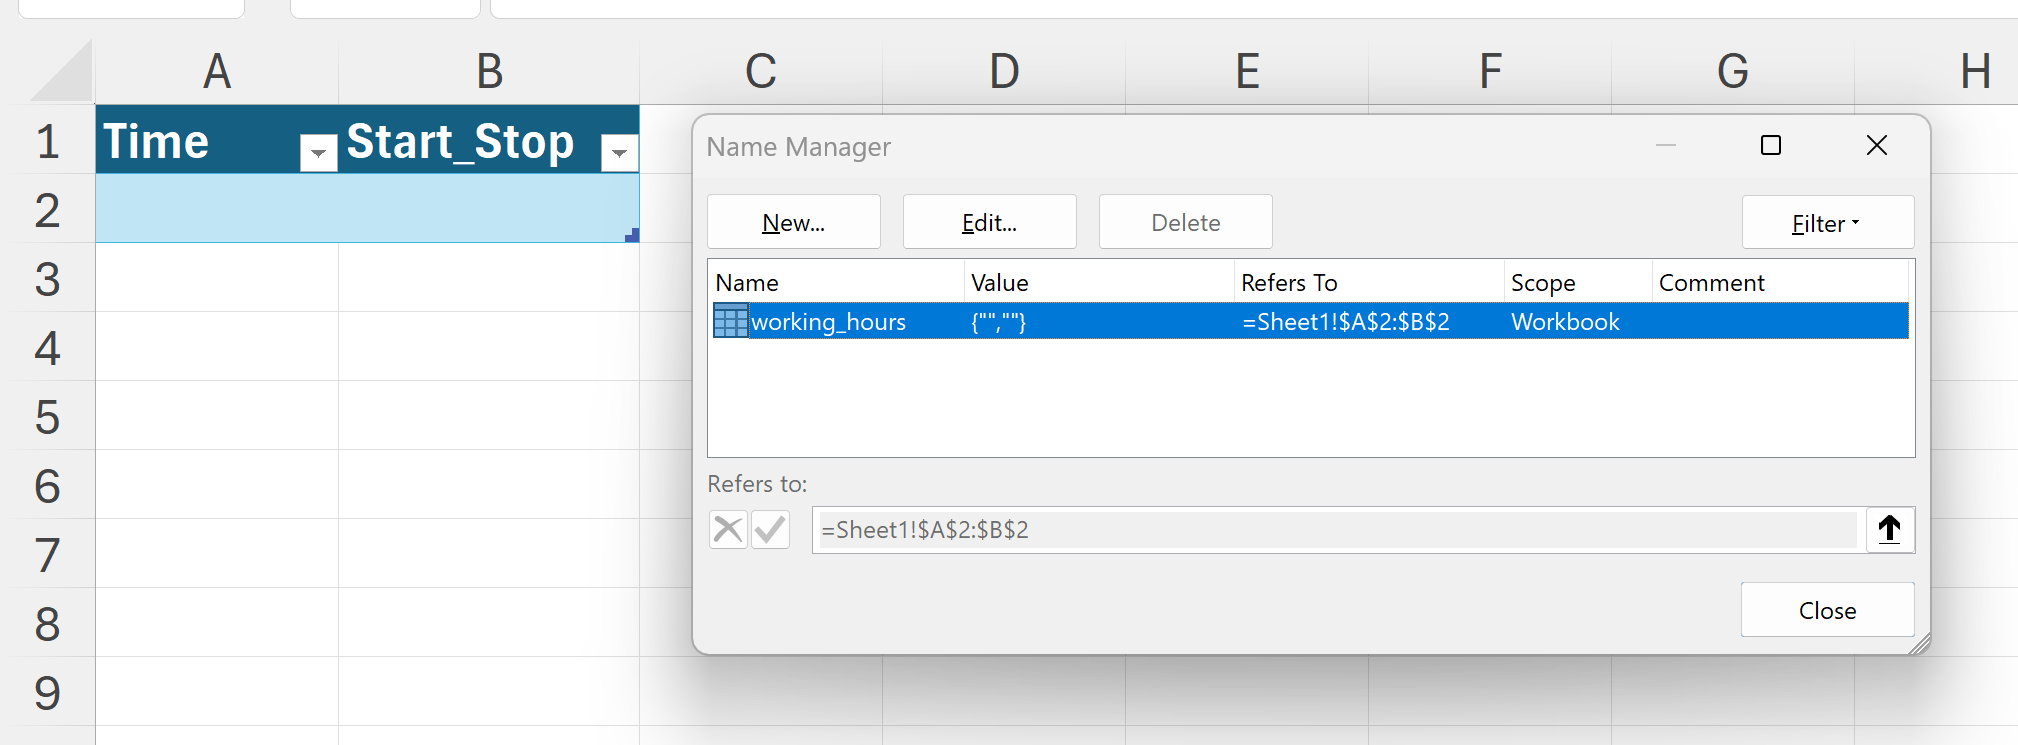
For this workflow, we’ll be recording start and stop times directly into an Excel table of our choice. Before setting up this flow, it’s crucial to establish the name and location of this table. Start by creating a blank table similar to the one below. Your table should include one column for the time of clocking in or out and another column to indicate whether it’s a start or stop work event:

Next, navigate to this Power Automate template which enables you to log working hours in Excel with just the push of a button:

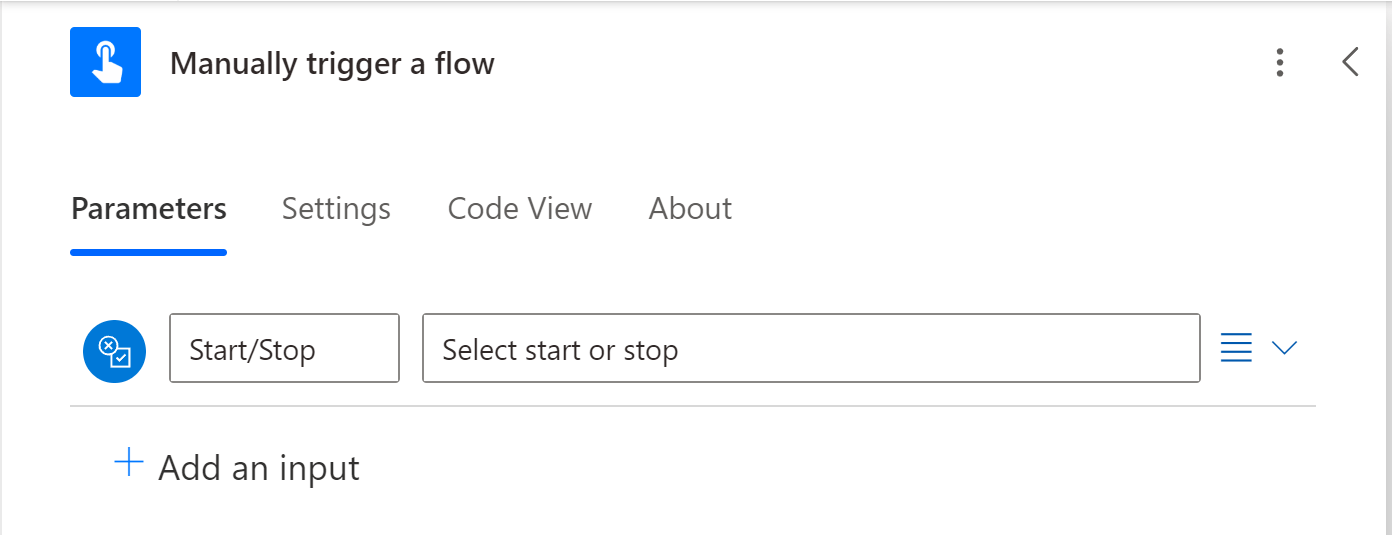
Click “Continue,” and you’ll see the flow diagram. Let’s start by setting up the flow trigger. This trigger will determine what happens when a user clicks on this flow—specifically, whether the user is clocking in or out. To do this, click on “Manually Trigger a Flow,” then select “Add an Input.”

Next, select the type of user input to be collected when the flow is triggered. We’ll choose the Yes/No option, which we can customize to log a Stop/Start state.

Go ahead and name this input “Start/Stop” and provide a brief description.

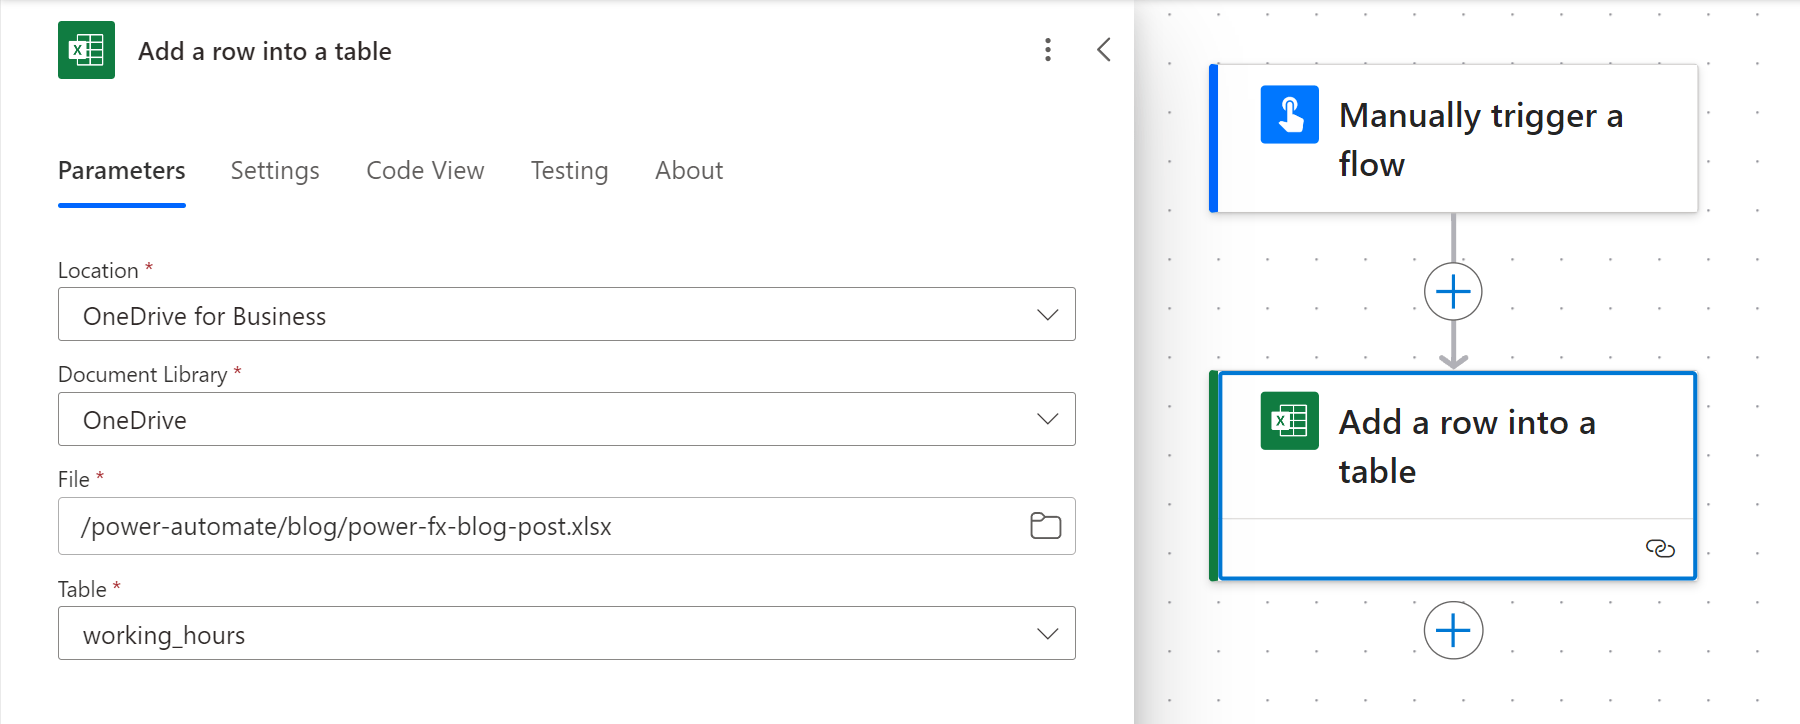
Awesome work! Next, we need to set up the next step in the flow, which involves choosing the table and file where this new row will be added. Click on the Excel card in the Power Automate workflow. First, specify the location and name of your workbook and table as shown below:

Next, let’s specify which columns to populate in this step of the flow. For our purposes of adding rows to the Excel table, we only need the Time and Start_Stop columns. Go to Advanced Parameters and deselect the other columns so that only these two are visible.

Next, let’s define how to distribute the data collected in the previous step across the table columns. Click on the lightning bolt icon next to each field’s text box to set this up. Assign a timestamp, which Power Automate collects automatically, to the Time column. For the Start_Stop column, link it to the outcomes of the earlier established trigger. If these options aren’t visible, you might need to select “Show more options” in the dropdown menu to find them.
After configuring the flow to save to the correct location with the appropriate fields, navigate to the home area and remember to save the flow. This ensures that you can also test it from the home screen.

Great! When you’re ready to test this flow in Power Automate, confirm that it’s set to manually trigger. Then, specify whether this is a start or a stop time—I’ll keep this toggled off to indicate it’s a start time.

Go ahead and run the flow. You should receive a success message shortly. Once it completes, if you open the workbook, you’ll see the results displayed like this!

There are a couple of aesthetic issues we need to address here. First, there’s that initial blank row; we can easily remove that. Remember, we included a placeholder in the body data cell as a part of the table to build upon.
A more significant concern is the formatting of our fetched time data. The Time column is difficult to read and doesn’t resemble the familiar date format Excel users typically handle. We need this to be more legible. Additionally, I’d like our start and stop times to be labeled clearly, rather than as true and false.
To rectify this, we can’t simply use the output that Power Automate provides. We’ll need to modify it, and we’ll do so using Power Fx. Head back to your flow and choose to edit it. Go to your second step and let’s revise these parameters—clear the current settings for Time and Start_Stop as we’re going to fix them.
This time, instead of directly using an input from earlier, we’ll insert our own expression. Go ahead and click the Fx icon to proceed.

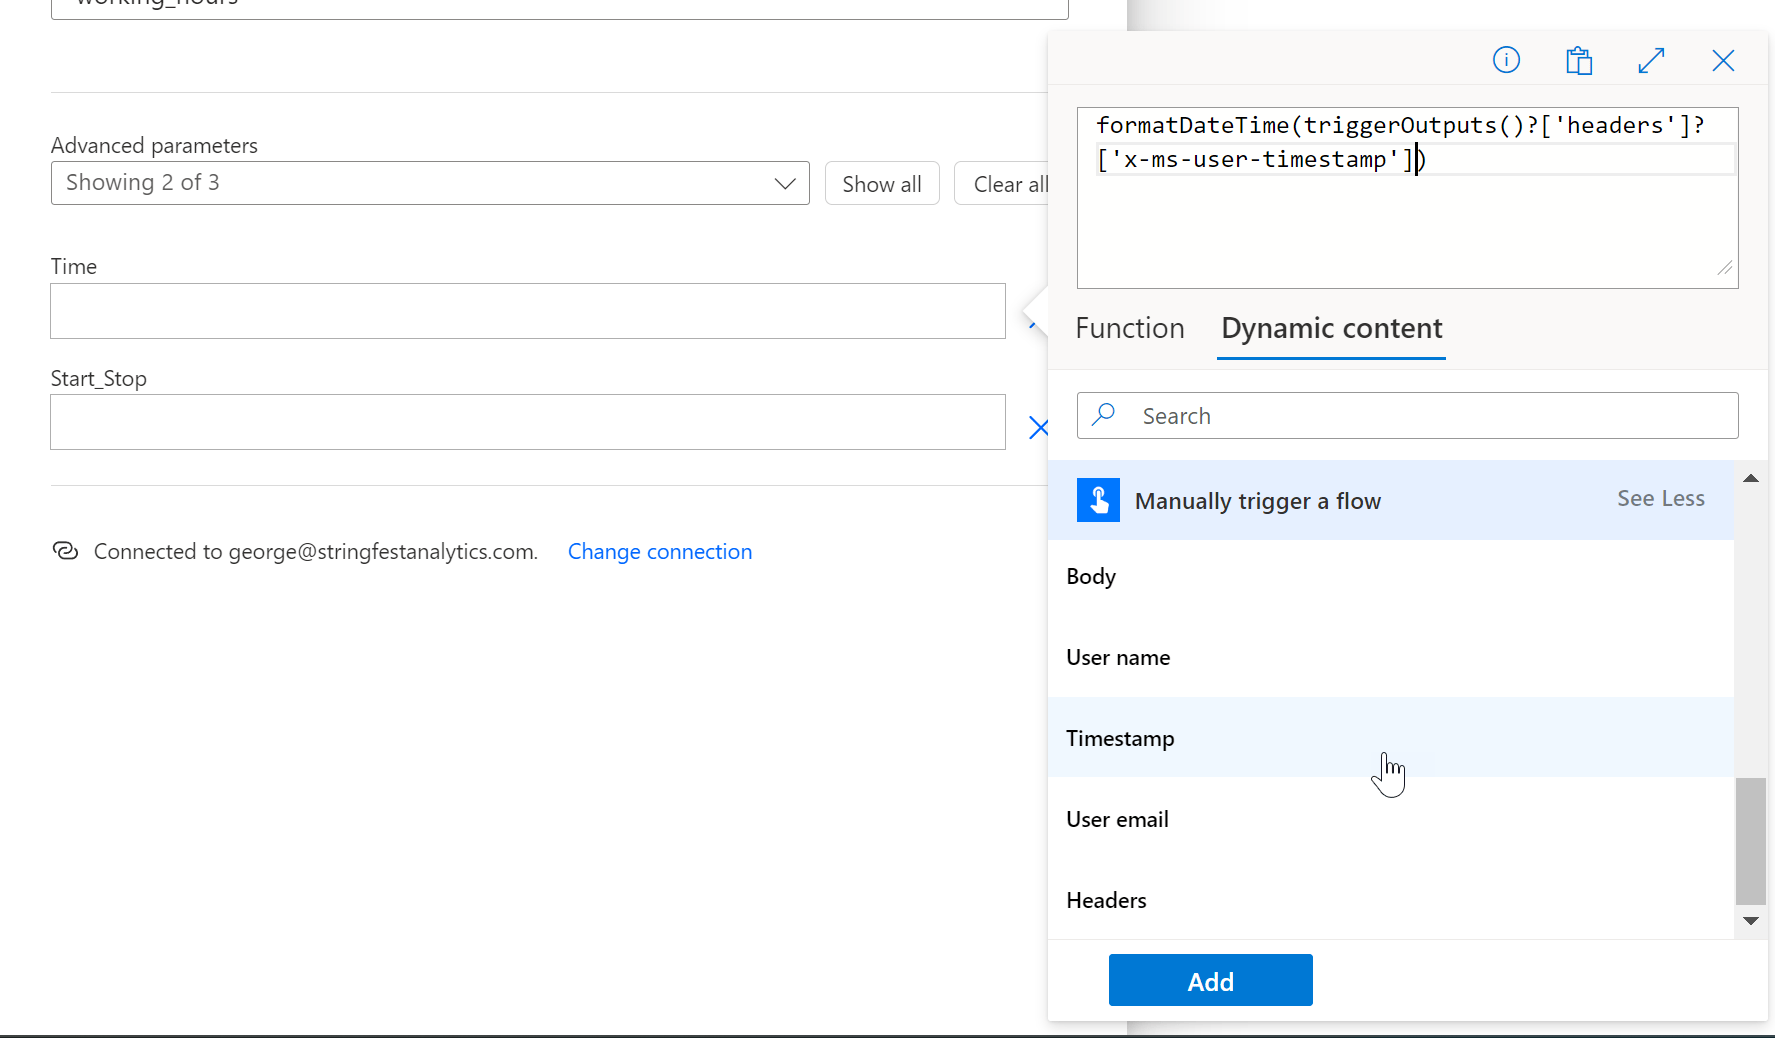
From this point, we can leverage IntelliSense to assist with coding. Simply start typing, and IntelliSense will suggest completions—just hit Tab to accept a suggestion. Of course, you’ll need some knowledge of Power Fx to know which function to use. A quick online search reveals that formatDateTime() is suitable for formatting time data in Power Fx. To use the original timestamp as an input for this function, navigate to the Dynamic Content tab under the code editor and select the appropriate parameter.

Perfect! Ensure your function matches the example below to format this into a more recognizable timestamp in Excel. Then, click “Add” to incorporate it into your flow.
We’ll apply a similar approach for the Start_Stop column, using an if statement to convert the TRUE/FALSE states to “Start” and “Stop,” respectively.
Your parameters for this section of the flow should now be set up as follows:

Go ahead and run your flow, and it should look much improved this time! Now the date and time are clearly readable. It’s displayed in military time, which may be confusing for some, but I appreciate the precision and will keep it. However, the timezone seems off for me—it’s a few hours ahead.
To correct this, we’ll need to adjust the expression in Power Automate. I’ll modify it to take the current time and convert it to my timezone, Eastern Standard Time. You’ll notice that I’m using the convertFromUtc() function nested inside formatDateTime() in Power Fx, similar to how functions can be nested in Excel.
Now, go ahead and rerun this flow, and you should see that the timezone has been adjusted to Eastern Time. Feel free to modify this to match the timezone you operate from!

Running this flow directly from Power Automate works well, but there’s an easier way, especially for those who don’t frequently use Power Automate. You can start the flow directly from the Excel workbook where your data is stored. Here’s how: open your workbook and go to the Automate tab on the ribbon. Here, you’ll see the flow listed under “Flows in this workbook.” Just click the three dots next to the flow to run it. You’ll even have access to the start/stop toggle.

I hope this post provided a useful introduction to how the Power Fx programming language can be utilized to tailor the results of Power Automate flows for better integration with Excel workbooks. Do you have any questions about Power Fx, Power Automate, or the broader Power Platform as it pertains to Excel? Let me know in the comments.
