Power Automate provides Excel users with a range of options for sending and receiving data through various event-driven and scheduled triggers. As expected, when integrating workflows across multiple solutions, issues can arise. In this post, we’ll explore some fundamental techniques for debugging our flows.
Building on a previous post, where I demonstrated how to import data from an RSS feed into Excel, we’ll intentionally introduce an error into the flow and guide you through the process of identifying and resolving it.
When a flow in Power Automate encounters a legitimate failure, an email notification will be sent to the flow’s owner, similar to the example below. These emails will keep you informed of which flows have failed and the frequency of those failures. By opening the flow from the email, you’ll be prompted to use the Flow Checker tool. You can learn more about the Flow Checker and how to diagnose issues at this link.

This is beneficial, but there are some issues to consider. For instance, users might want to be notified faster than the flow owner about the failure. Moreover, to complicate matters, there are scenarios where a flow might go wrong without outright failing or not running, creating ambiguity.
Below, we will delve into a more advanced approach for detecting, adjusting, and notifying about errors using conditional flows. Initially, we will identify methods to pinpoint flows that are not returning the expected data. Subsequently, we’ll discuss effective strategies for collaborators to monitor and manage these flows.
Essentially, we are enhancing our flow with additional error-checking measures by incorporating a final conditional step. This step instructs Power Automate to perform a specific action if a bug is encountered during the flow’s execution. A bug might mean that the flow fails completely or that it does not deliver the expected data—both scenarios need to be addressed.
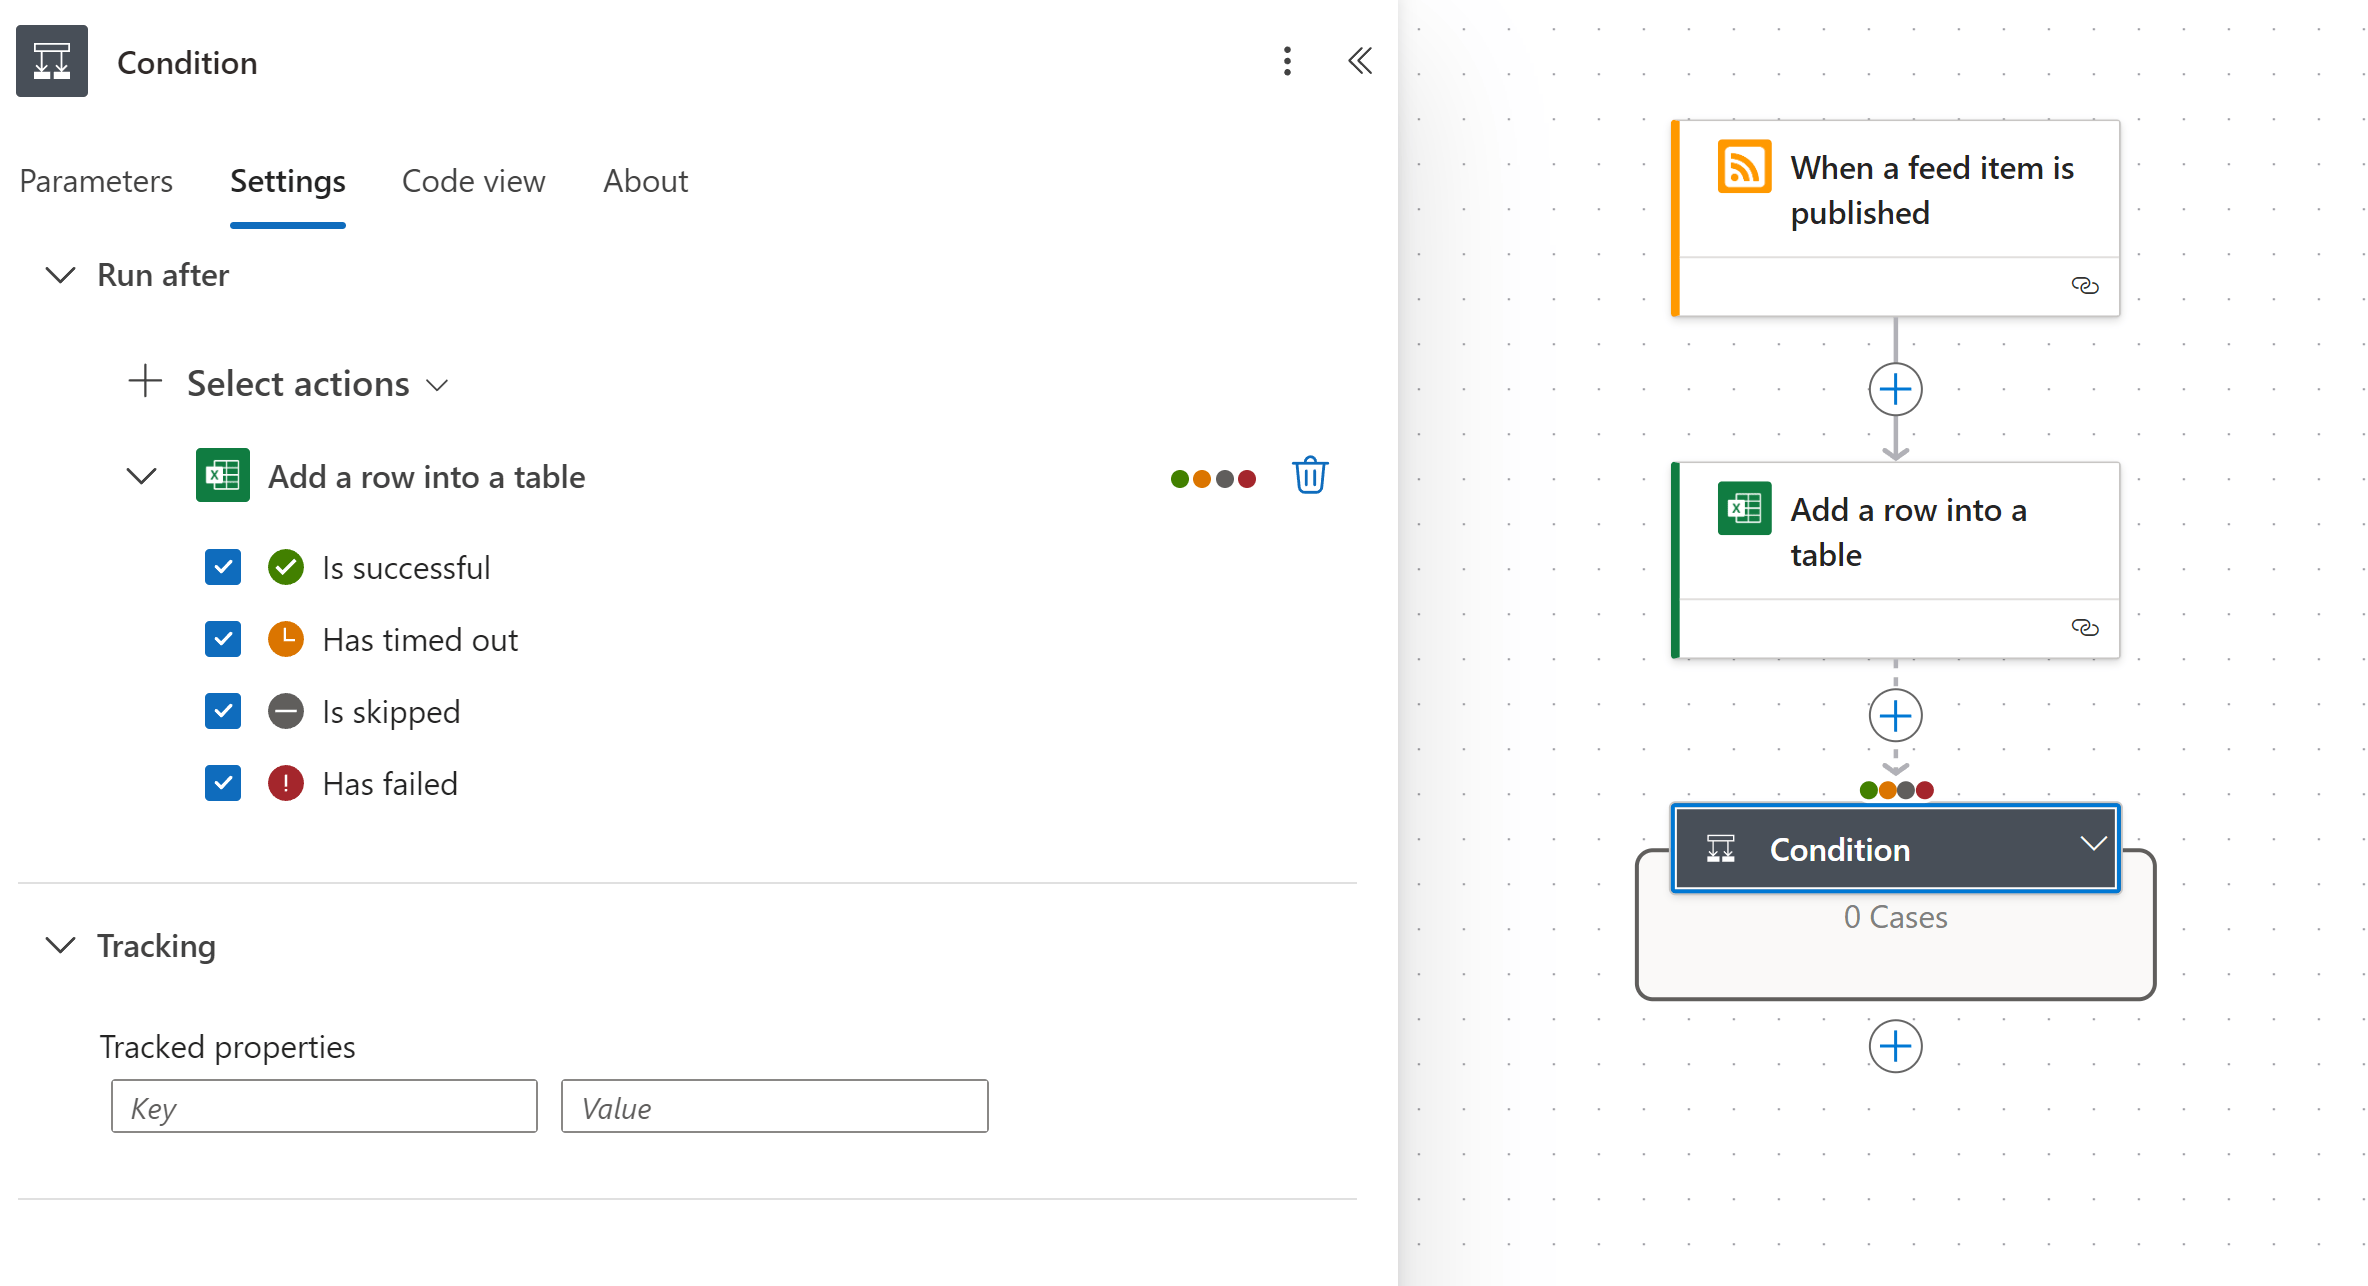
To begin, we will add a new Condition step to our flow. After you’ve done that, right-click on that step and select Run after:

In Power Automate, the “Run after” feature in a Condition step lets you define specific circumstances under which subsequent actions will execute, depending on the results of the preceding step. You can configure actions to trigger only if the previous condition succeeded, failed, was skipped, or timed out, thus allowing for meticulous management of the flow’s execution path. Although one approach could be to set this flow to activate only when the previous step did not execute, I will select all conditions for reactivation. This is because a flow executing does not necessarily mean it returned the desired data.

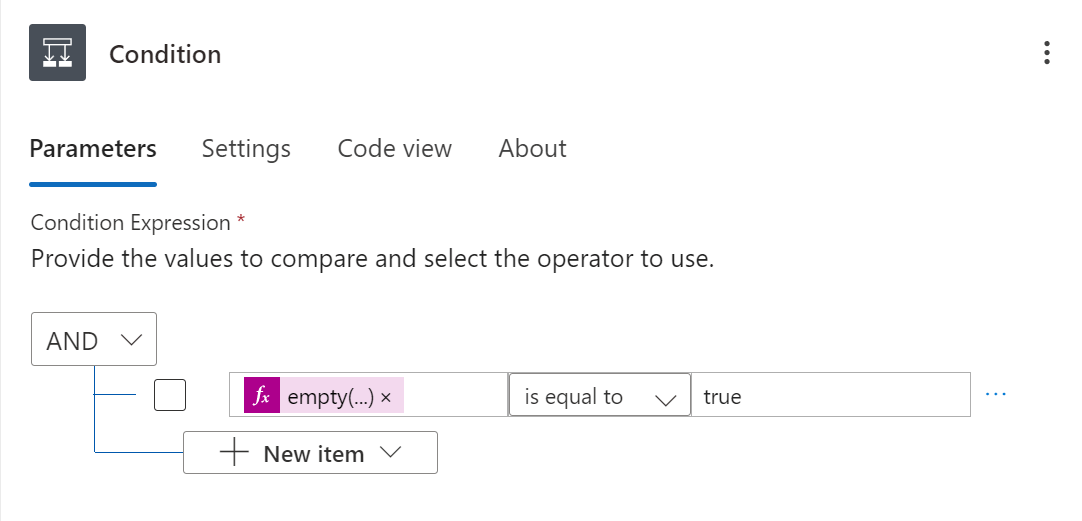
Next, we need to set up some kind of condition to make sure that this flow is working correctly. I am going to use the date posted field in the RSS feed. Let’s say that I really need this date field because I want to really analyze the frequency of the RSS updates perhaps even more so than the contents of the post. So what I’m going to do is set up a condition to check whether if the field is blank, we can do that with some Power Fx magic:
and set that equal to true:

Now we are going to set up what to do if this happens, if we do get a blank cell in the date field. I am going to post to Teams with a basic medssage. This way there is plenyt of dcommunication and visbiolity if something isn’t working:

I’m going to revert to the previous step where data is added to my table, and temporarily disable the Feed published on dynamic data for the Date Posted column in the workbook. We can’t manually trigger a flow here since it’s someone else’s RSS feed, but this feed updates frequently—it’s from a world breaking news service, after all!
When a feed item lacking a date is added to the workbook, you should see a notification like this in your Teams:

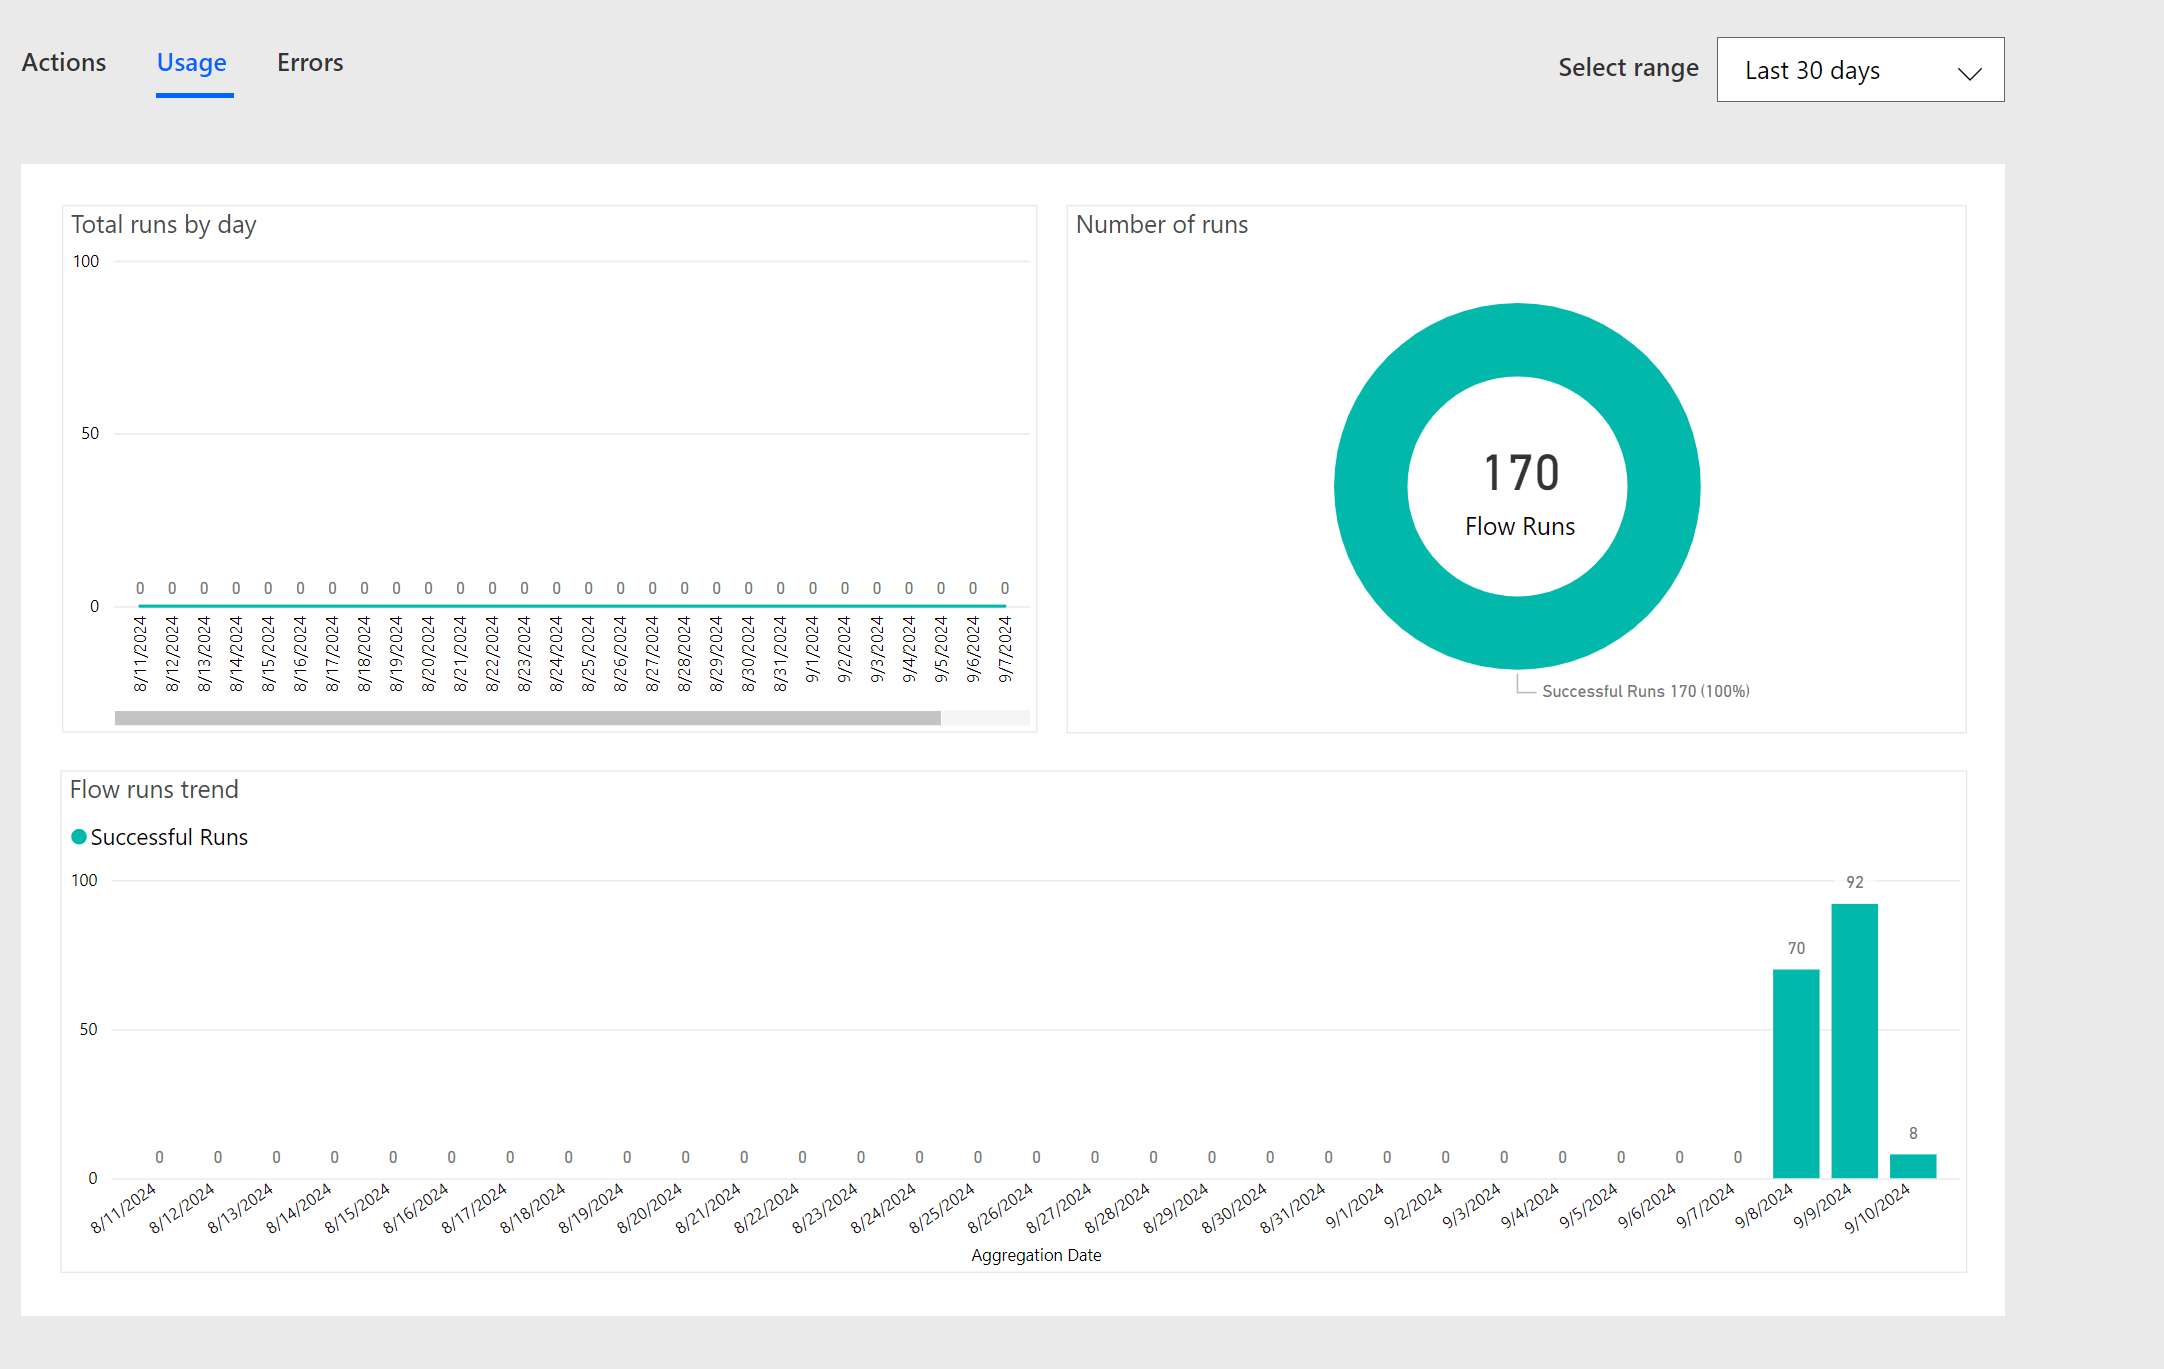
Besides implementing these error-checking measures, it’s also wise to routinely check the status of your flow. You can gather considerable insights by examining the flow details in Power Automate. Specifically, the 28-day run history will reveal how often the flow was executed and if there were any issues during its operation. However, keep in mind that just because the flow ran, it doesn’t guarantee that you received the desired outcomes, like a non-blank value in the date field of your workbook, as in our example.

You can also visit the Analytics page in Power Automate. This feature generates a useful Power BI report that allows you to monitor the flow’s performance over time, including any errors and other relevant metrics.

Power Automate is a remarkably powerful tool that enables Excel users to integrate seamlessly with multiple applications. However, as flows become more complex, the potential for errors increases—and we’ve all experienced the frustration of an automation failing unnoticed until it escalates into a significant problem. By taking the right precautions, you can mitigate these issues and address them early. Do you have specific questions about debugging and error catching in Power Automate, or are you curious about how Power Automate can enhance your Excel experience more broadly? Please share your questions in the comments.
