Daily Excel users are typically tasked with managing a variety of business processes, not just analyzing data. These processes can be manual, error-prone, and time-consuming, diverting business users from more valuable activities. Fortunately, Power Automate can be used to automate these processes and maintain a comprehensive log of all activities.
In this post, we will create a basic expense approval workflow. Users will complete a form which then goes for approval. The details of the original request and the outcome of the approval will be recorded in an Excel workbook.
To get started, visit Microsoft Forms at this link and create a simple expense approval form following this example:

Next, navigate to make.powerautomate.com, and we’ll use the completion of this form as a trigger to initiate a flow. Select “Automated cloud flow,” and set the trigger to “When a new response is submitted.”

Now, our objective includes extracting details from the completed form and adding them to our Excel workbook. To accomplish this, we will add a new step here called “Get response details.” We will use the Response ID as a primary key to retrieve details from the respective form response for use in later steps of the flow.

Now that the form is complete, we’ll proceed to the approval stage. The next step involves setting up the “Start and wait for an approval” process. You’ll need to specify details such as the approvers, the sequence of approval, and the name of the approval form. In the Details section, I will include several entries from the form to ensure the approver understands what they are being asked to approve.

Great work! This approval will generate some important data, such as the outcome of the approval (approved or declined?) and any comments left by the approver. Next, set up a blank table in an Excel workbook in our OneDrive connected to this Power Automate account. I’ll include fields such as the form response ID number, details provided by the requester, and fields related to the outcome of the approval and any comments left.

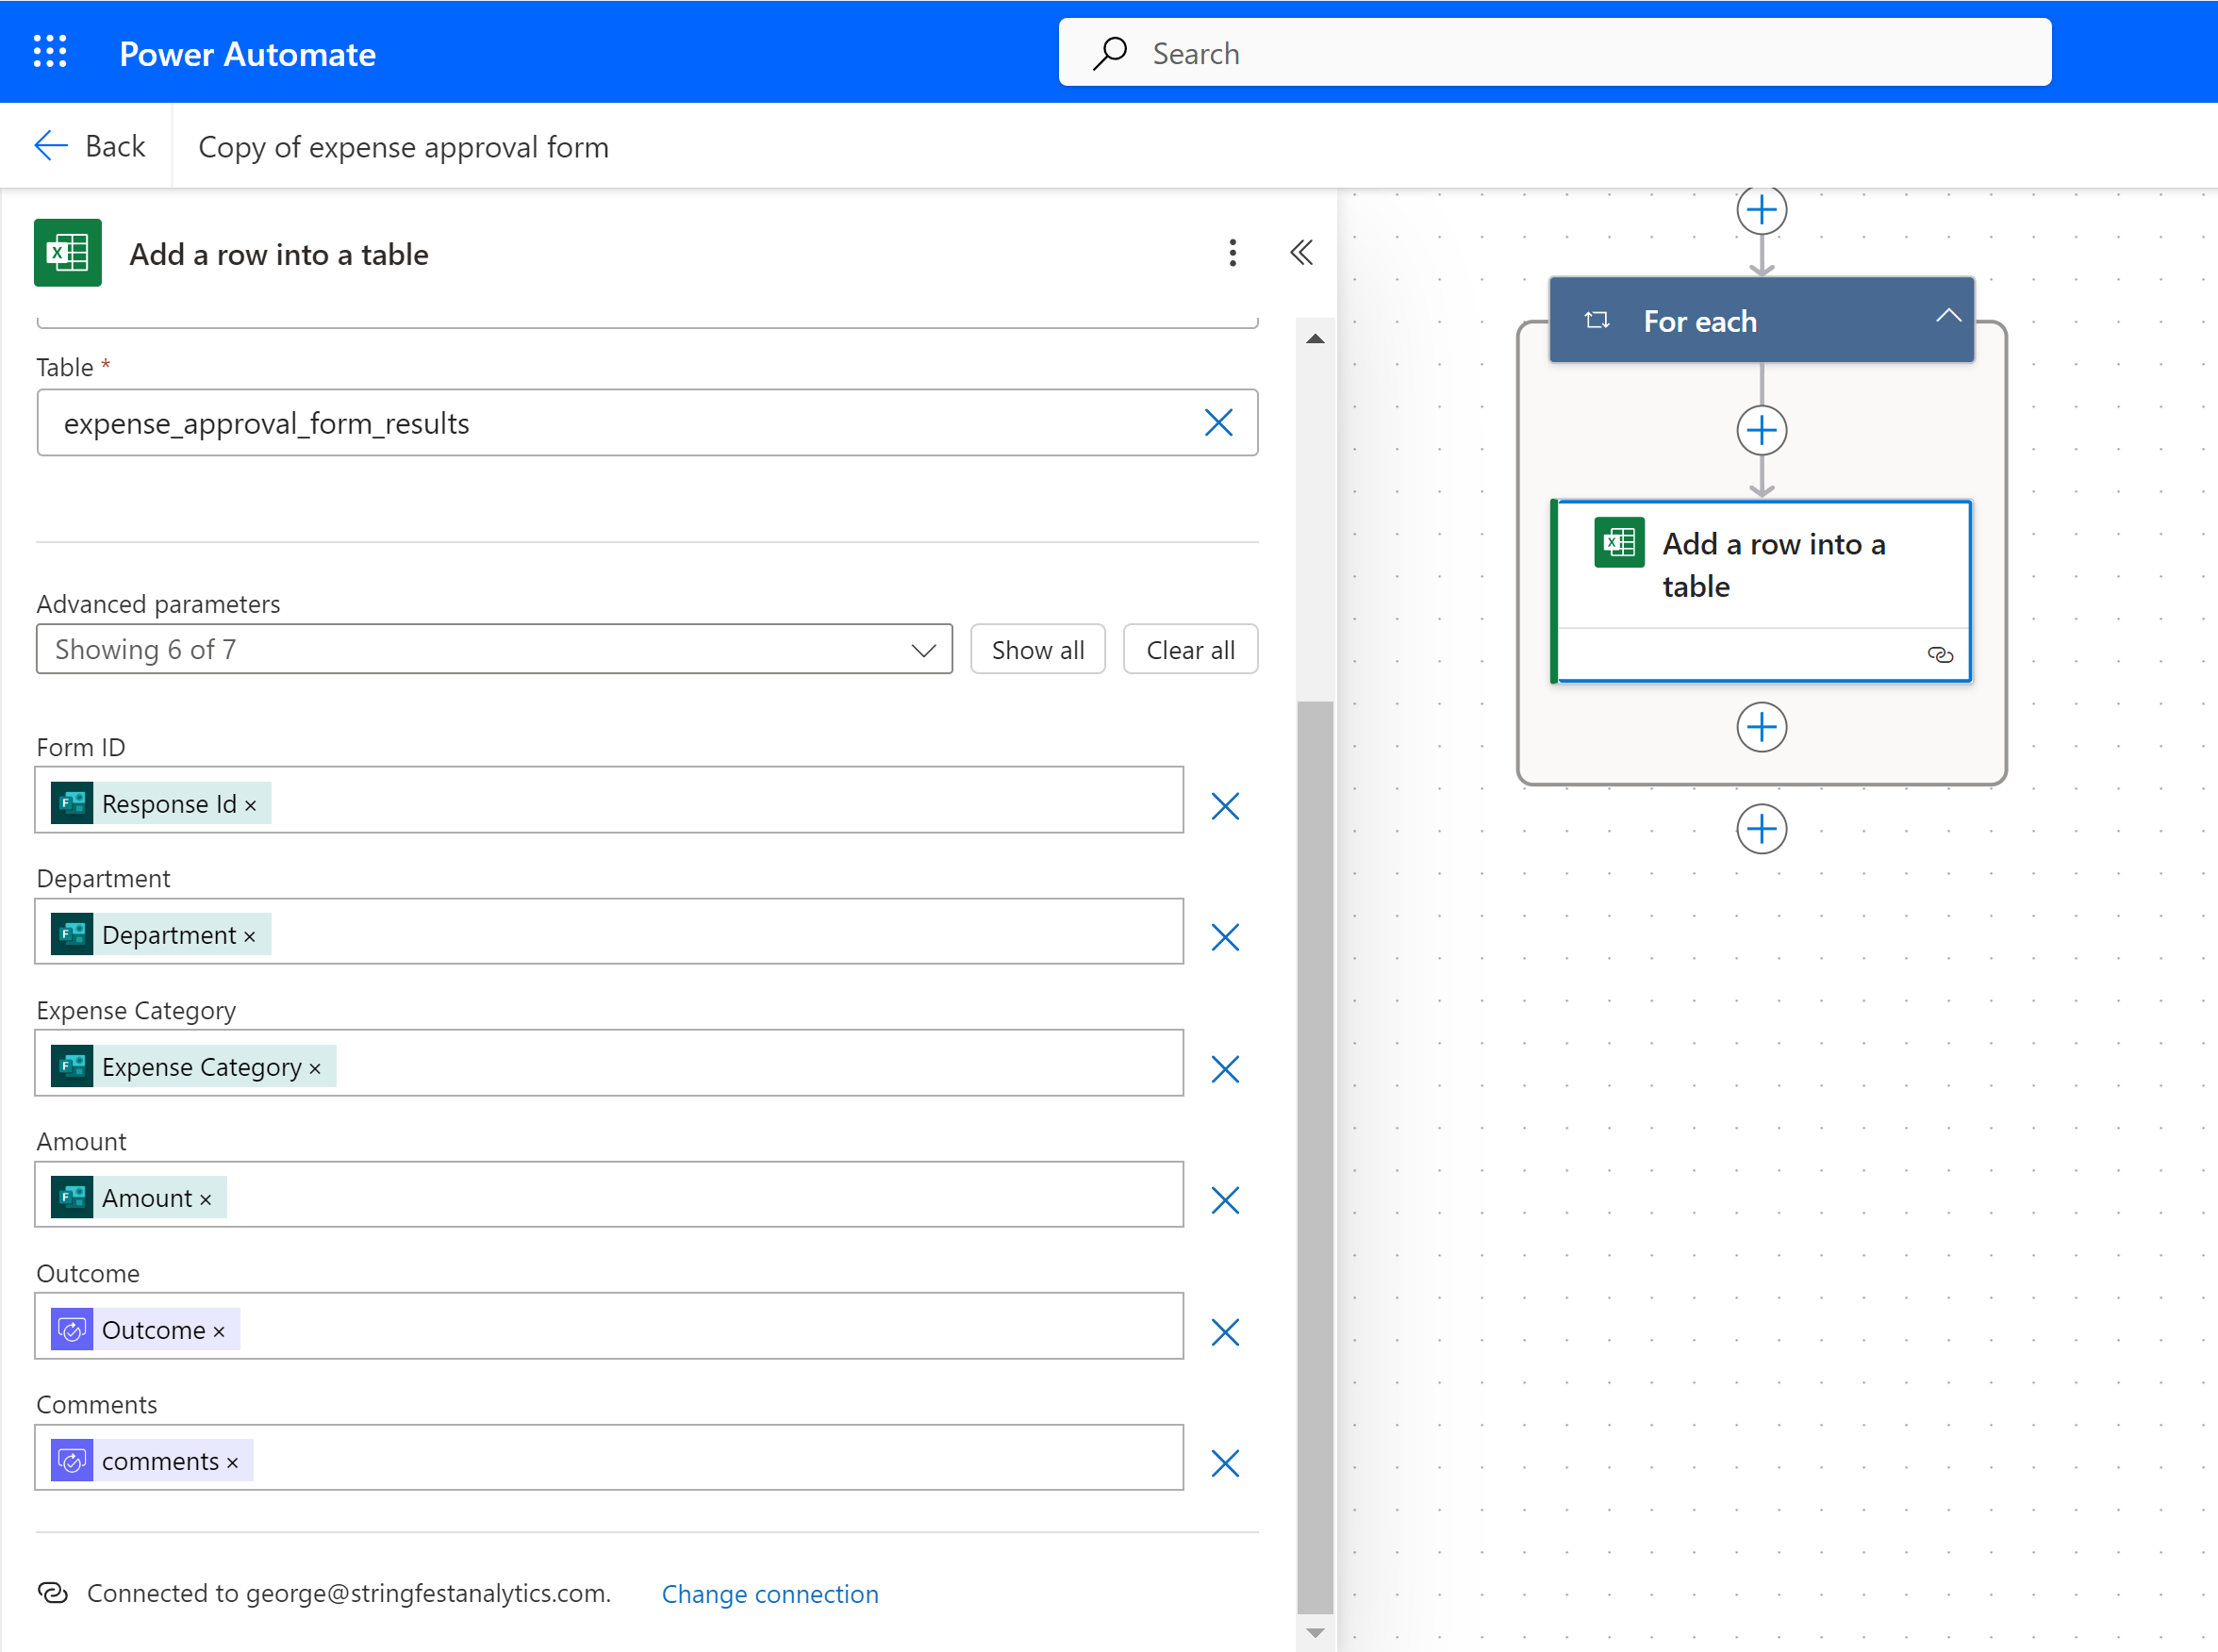
The next step in our flow will be to add the results from these previous steps into a new row in the table. You’ll notice in the parameters that I am referencing data points from previous steps to be included in the table row, incorporating both the form results and the outcomes of the approval.

Go ahead and save the form, then test it out a bit! When someone submits a response, the designated approver will receive an email and a notification in Teams regarding this expense form:

Once the approval is handled, the details of the form and the approval outcome will be added to the table:

We’ve just covered how to establish an efficient approvals process using Excel, Microsoft Forms, and Power Automate. To be clear, setting this up involves considerable effort. Automating any process typically requires trial and error, and it took me numerous attempts to refine this workflow to my satisfaction. Still, there’s likely room for further enhancements. The real benefit of deploying such automation lies in reclaiming time from routine administrative tasks, allowing you to delve deeper into data analysis and business improvement.
Do you have any questions about this setup or using Power Automate as an Excel user? Let me know in the comments.
