When working with text data in Excel, it’s common to need to split strings by various delimiters such as commas, semicolons, and so forth. Although the legacy Text to Columns feature has its uses, it’s somewhat limited as a one-time operation that doesn’t automatically update with new data, can’t handle unique circumstances like missing delimiters, and so forth.
This is where the TEXTSPLIT() function shines. In this post, we’ll explore its capabilities with practical examples. To follow along, download the example file provided below.
First, let’s run through the parameters of TEXTSPLIT(). Like many of the newer dynamic array functions in Excel, this one comes with quite a few of parameters. We won’t cover all of them in use here, but they’re listed below, and you can always check out the Microsoft documentation for further details:
| Parameter | Description | Required/Optional |
|---|---|---|
| text | The text string that you want to split. | Required |
| col_delimiter | The character or string that separates columns. | Required |
| row_delimiter | The character or string that separates rows. If omitted, splits only into columns. | Optional |
| ignore_empty | A logical value that determines whether to ignore empty cells (TRUE) or include them (FALSE). Defaults to FALSE. | Optional |
| match_mode | Controls case sensitivity for delimiter matching. 1 for case-insensitive, 0 for case-sensitive. Defaults to 0. | Optional |
| pad_with | The value used to pad the result when there are more delimiters than text elements. Defaults to #N/A. | Optional |
Great! Let’s dive into some examples. To get started, let’s split this list of fruits across columns using the second parameter, using a comma as a delimiter:
=TEXTSPLIT(A1, ",")
You’ll notice that the result is a spilled array. If you’re not familiar with dynamic arrays and dynamic array functions, please check out this post:
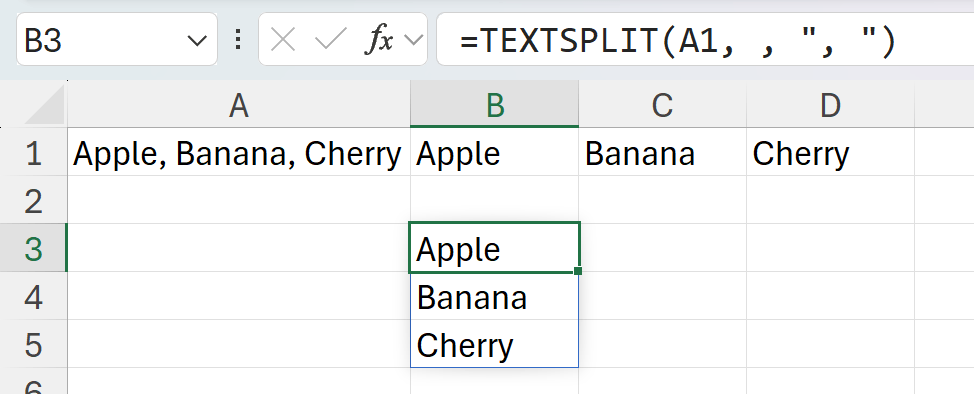
If we want to display these results down the rows, all we need to do is use the row delimiter argument instead. We can simply leave the column delimiter blank:
=TEXTSPLIT(A1, , ",")
One thing we might notice here, which wasn’t as obvious when they were in their own columns, is that now these records look a little out of alignment. This is because there’s actually an extra space between “Banana” and “Cherry” that we didn’t account for. It’s causing the leading space in those two entries. To fix that, we can just add that whitespace next to the comma:

Next, let’s explore splitting by both rows and columns. Here, we have a set of data that resembles key-value pairs about an individual which is quite hard to read. To make it more readable, we can expand this into a table. We’ll split the colons to create new columns and use semicolons to indicate new rows:
=TEXTSPLIT(A1, ":", ";")
If there’s a missing value or an extra delimiter, by default Excel will leave an empty cell for that particular value in the results. To override this behavior, simply set the fourth parameter, ignore_empty, to TRUE.
=TEXTSPLIT(A1, ",", , TRUE)
Last but not least, we can handle a similar scenario when the data is set up to split into both rows and columns, but a missing value would disrupt the structure of the result, leading to an uneven number of rows in each column. In this case, we can use the last parameter, pad_with, to fix this mismatch:
=TEXTSPLIT(A1, "=", ", ", , , "N/A")
In conclusion, TEXTSPLIT() is a powerful dynamic array function that excels at organizing often text-heavy data from complex strings, cleaning datasets, transforming key-value pairs into tabular formats, or preparing data for analysis. How do you plan to use TEXTSPLIT() in your Excel work, or have you already discovered a creative application for it? Please share your experiences, plans, or any questions or comments below.
