We’ve probably all been there: receiving countless emails from our boss, struggling to keep track of them. Despite trying various techniques in Outlook or in other tools, things just aren’t clicking. We’d love to see the data in a format that matches how we think and visualize it—in an Excel spreadsheet!
Fortunately, this task becomes straightforward with the help of Power Automate. In this post, we’re going to look at a simple flow to track all incoming emails from a specific email address into an Excel workbook. You can follow along with the example file below:
Make sure the file is uploaded to a OneDrive or SharePoint location and that you have a license that includes Power Automate to continue. For more details, you can refer to the Power Automate Licensing FAQ.
Walk through the workflow manually first
As mentioned, the goal of this flow is to list all incoming emails from our manager. Before we try automating this task, it’s a good idea to manually do it ourselves for a bit. This will help us think through exactly how the workflow should run and what we really want to include in the table. Automating a task effectively won’t work if we can’t explain every step of the process ourselves!
I’ve started tracking these emails and decided that what I really want to track is when the manager sent these emails, who else received them, and the subject and preview of the text so I can remember what it was about. From there, I want to be able to write a short reminder note to myself about what to do next.
So, my manual starter table looks something like this:

Note that I have put this data into an Excel table and named it something sensible, in this case emails. This is a good idea because we will identify this table by name in Power Automate when it’s time to update the data. As you will see, like many other modern tools for Excel, Power Automate works much better when the data is in a table!
Creating the workflow
Next, go to make.powerautomate.com to build this for ourselves.
Power Automate is designed to be a low-code/no-code environment where we can link different applications and tasks. If you’re familiar with Zapier or IFTTT, it’s a very similar concept. Power Automate now even features Copilot as a way to get started with building a flow from a set of natural language instructions. Let’s try it out, prompting “When my manager sends me an email, update an Excel table.”
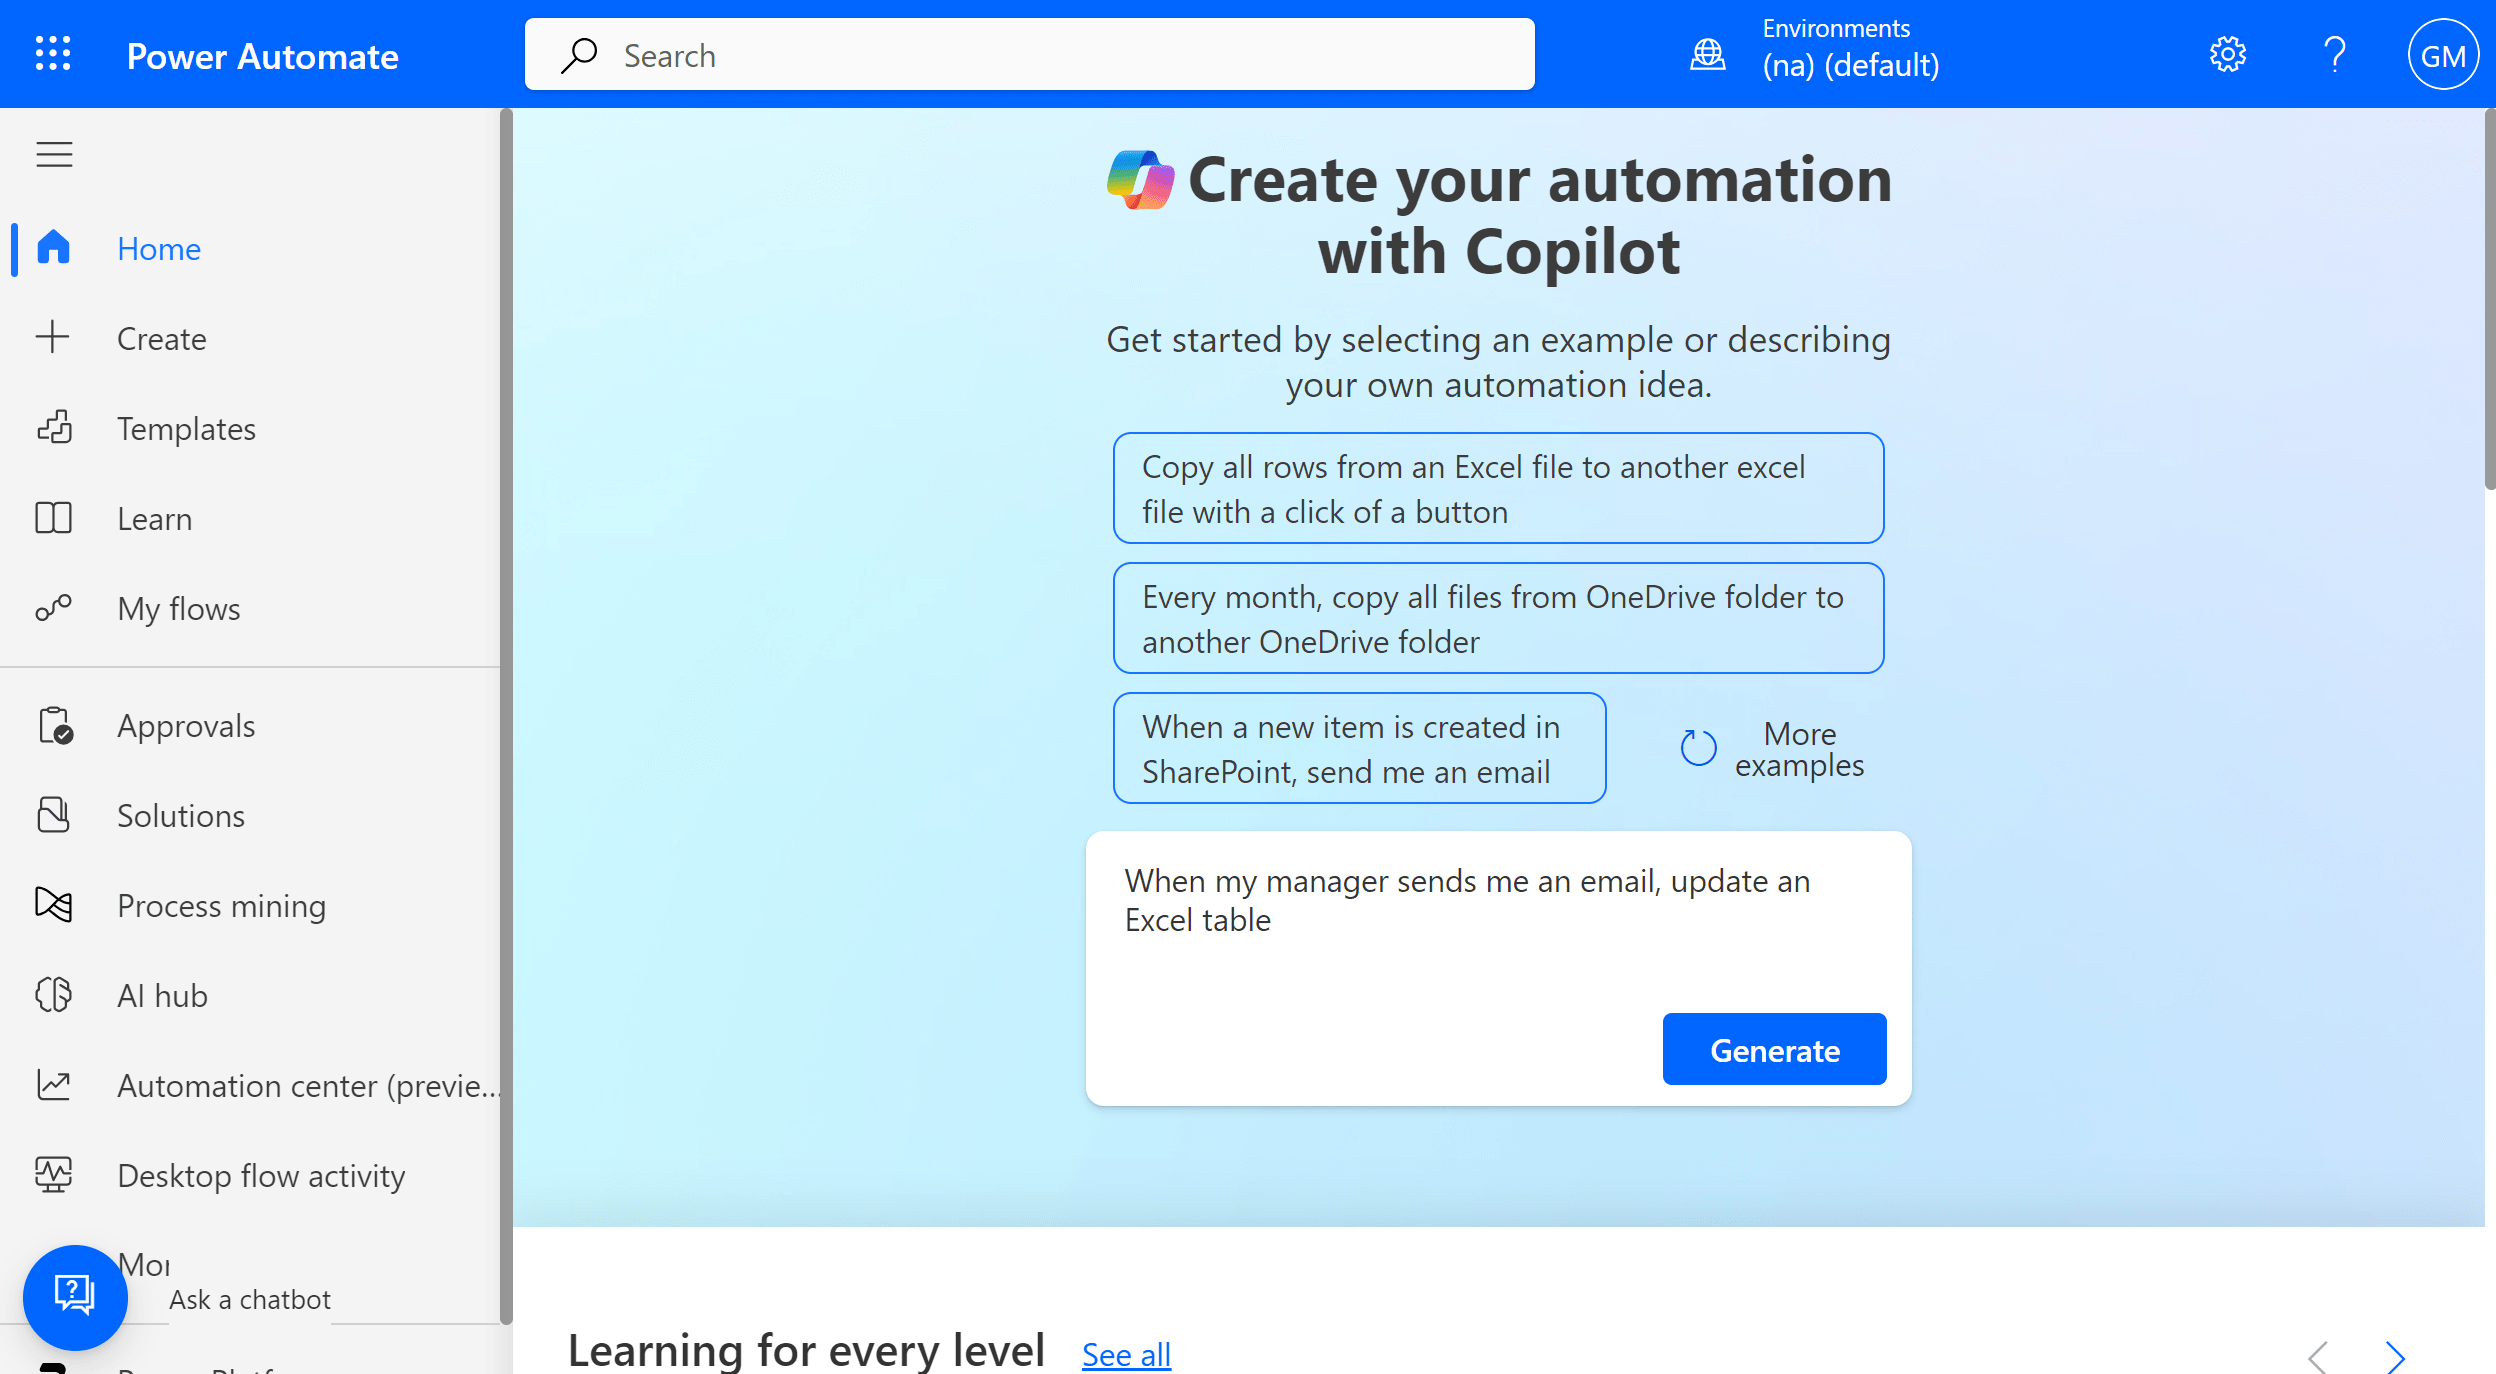
Send this prompt to Power Automate, and you’ll receive a fairly accurate response. It suggests that the flow should start when a new email arrives, which will trigger a row being added to a table. Later on in the flow design, it will be up to us to specify which emails to target, the table to use, and other details.
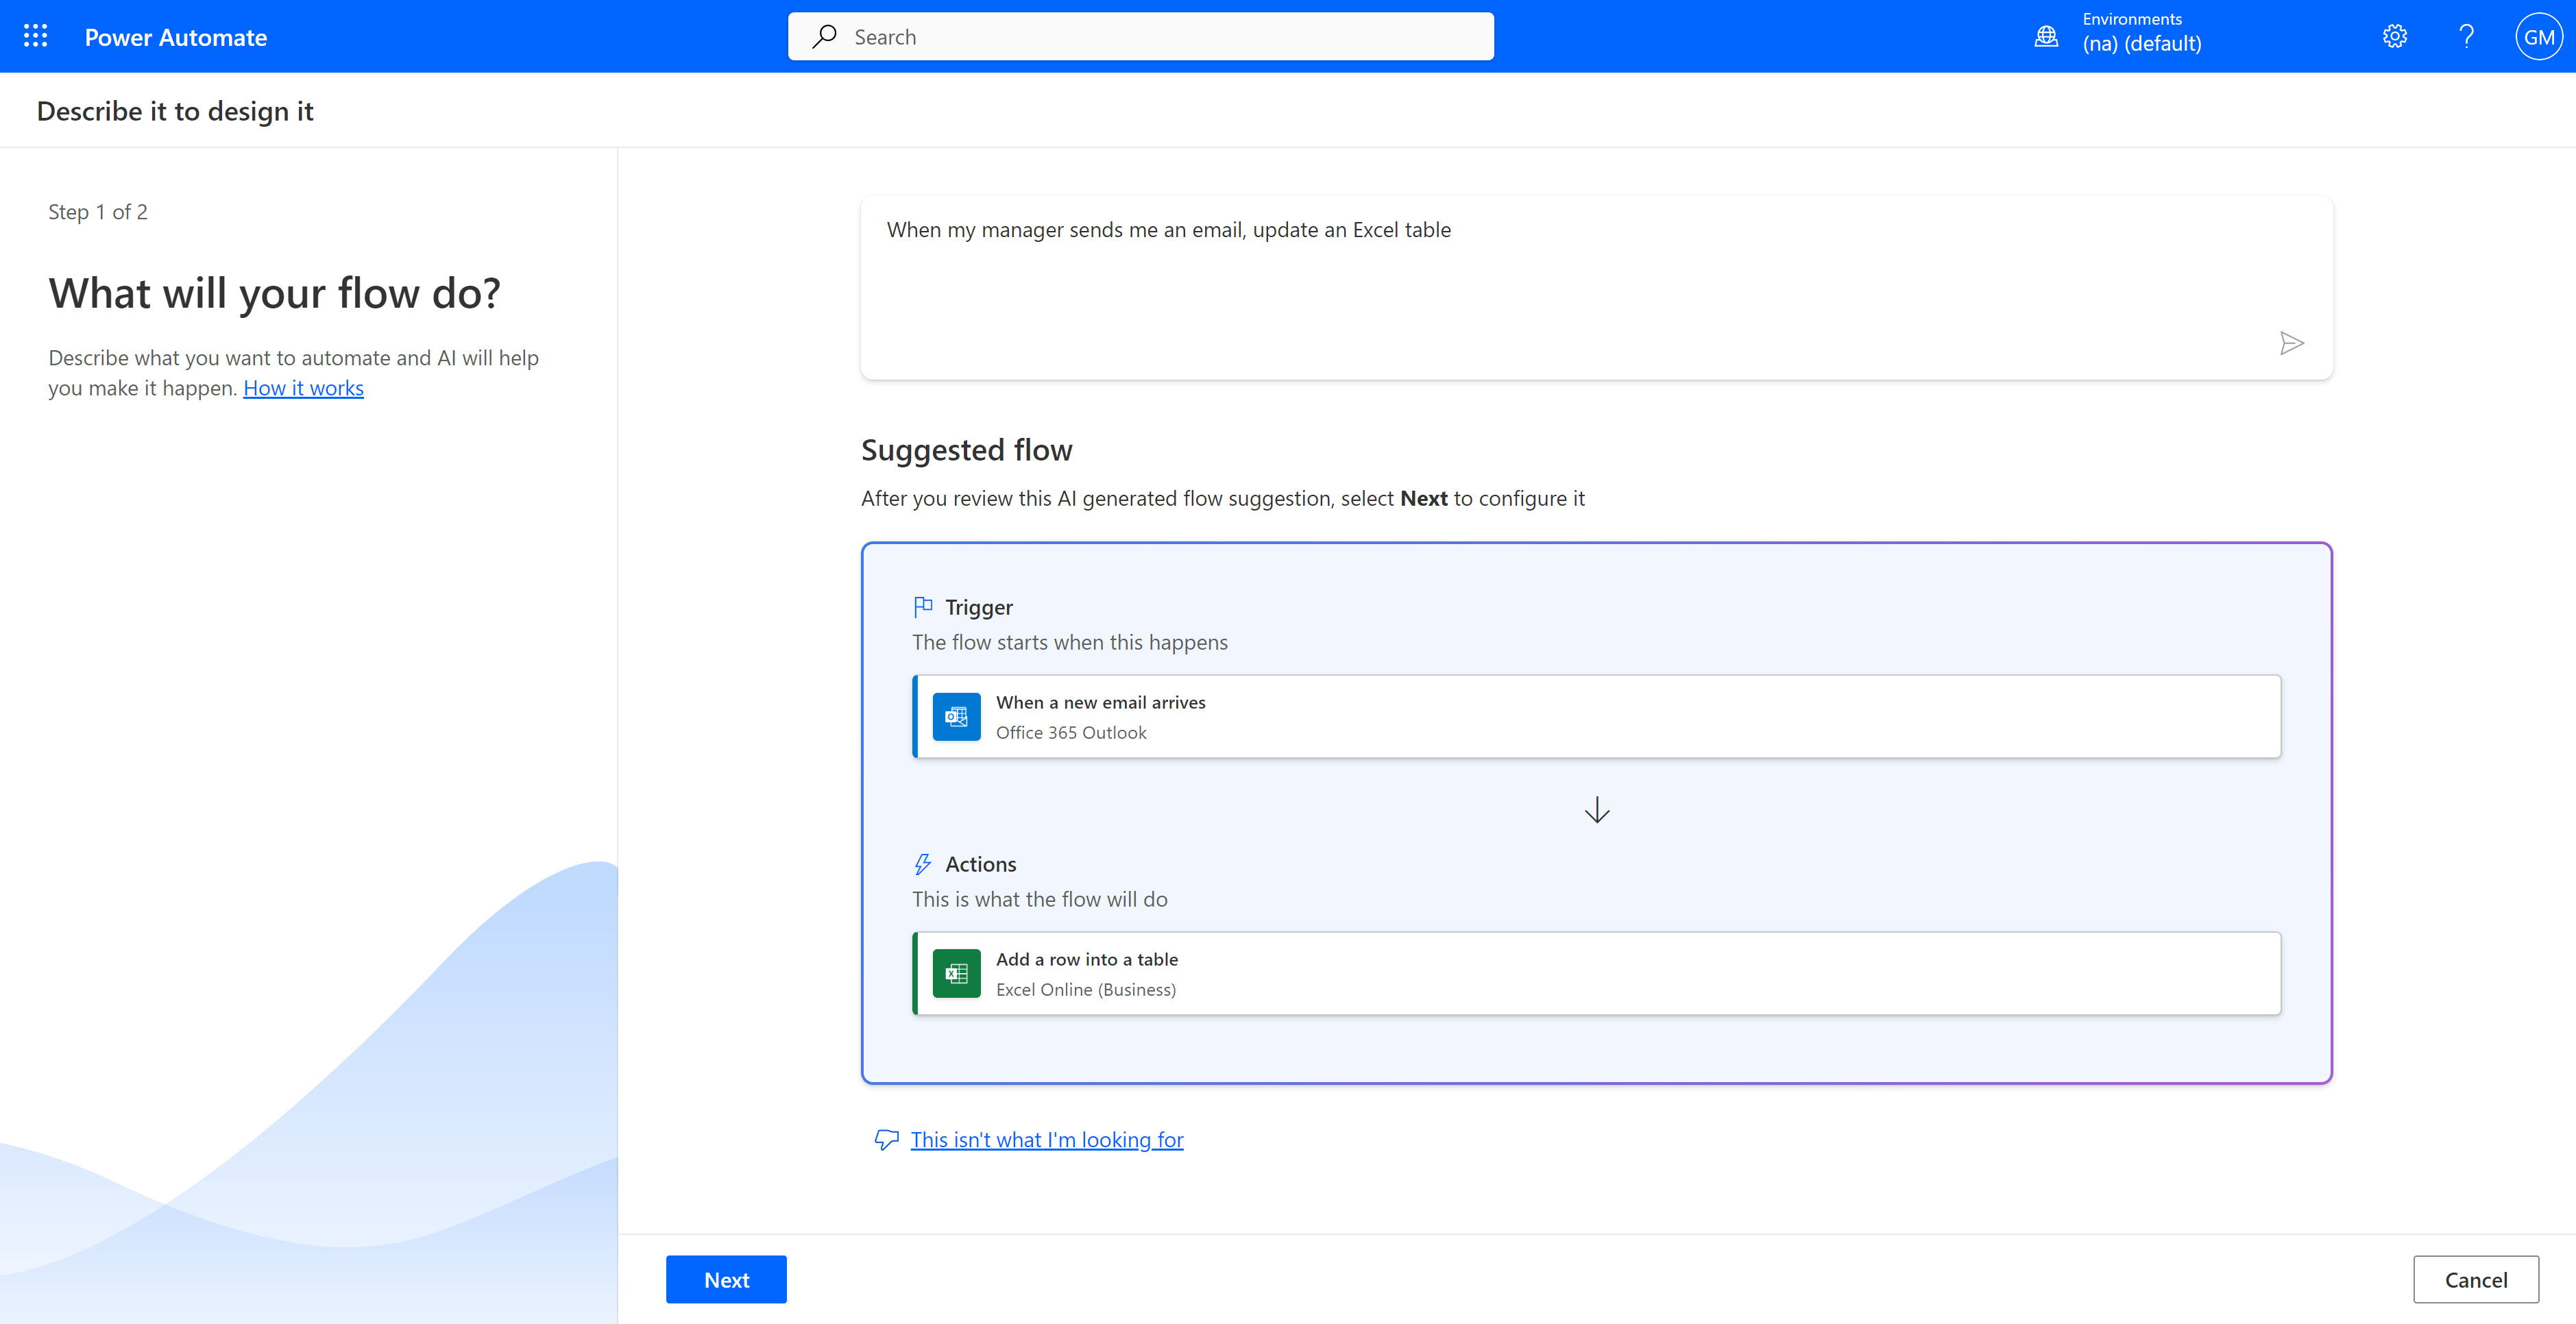
Click Next to confirm that you are connected to the correct Outlook and Excel accounts. Keep in mind that although the service is listed as Excel Online, any flows created will also work on the desktop. Just ensure they are saved in the appropriate OneDrive or SharePoint location.

Now that the flow has been mapped out and connected, you can create it by clicking “Create Flow.” However, to make this flow actually useful, we need to map it to some parameters. First, let’s add some constraints around what is meant by a new email arriving.
Click on this part of the flow in the diagram, and under “From,” add your boss’s email. Keep in mind that this means the flow will only work when you receive an email from this address. You might want to edit this to receive emails from another address or addresses while testing, so you don’t have to wait for an email from your boss to test it. More on that later.
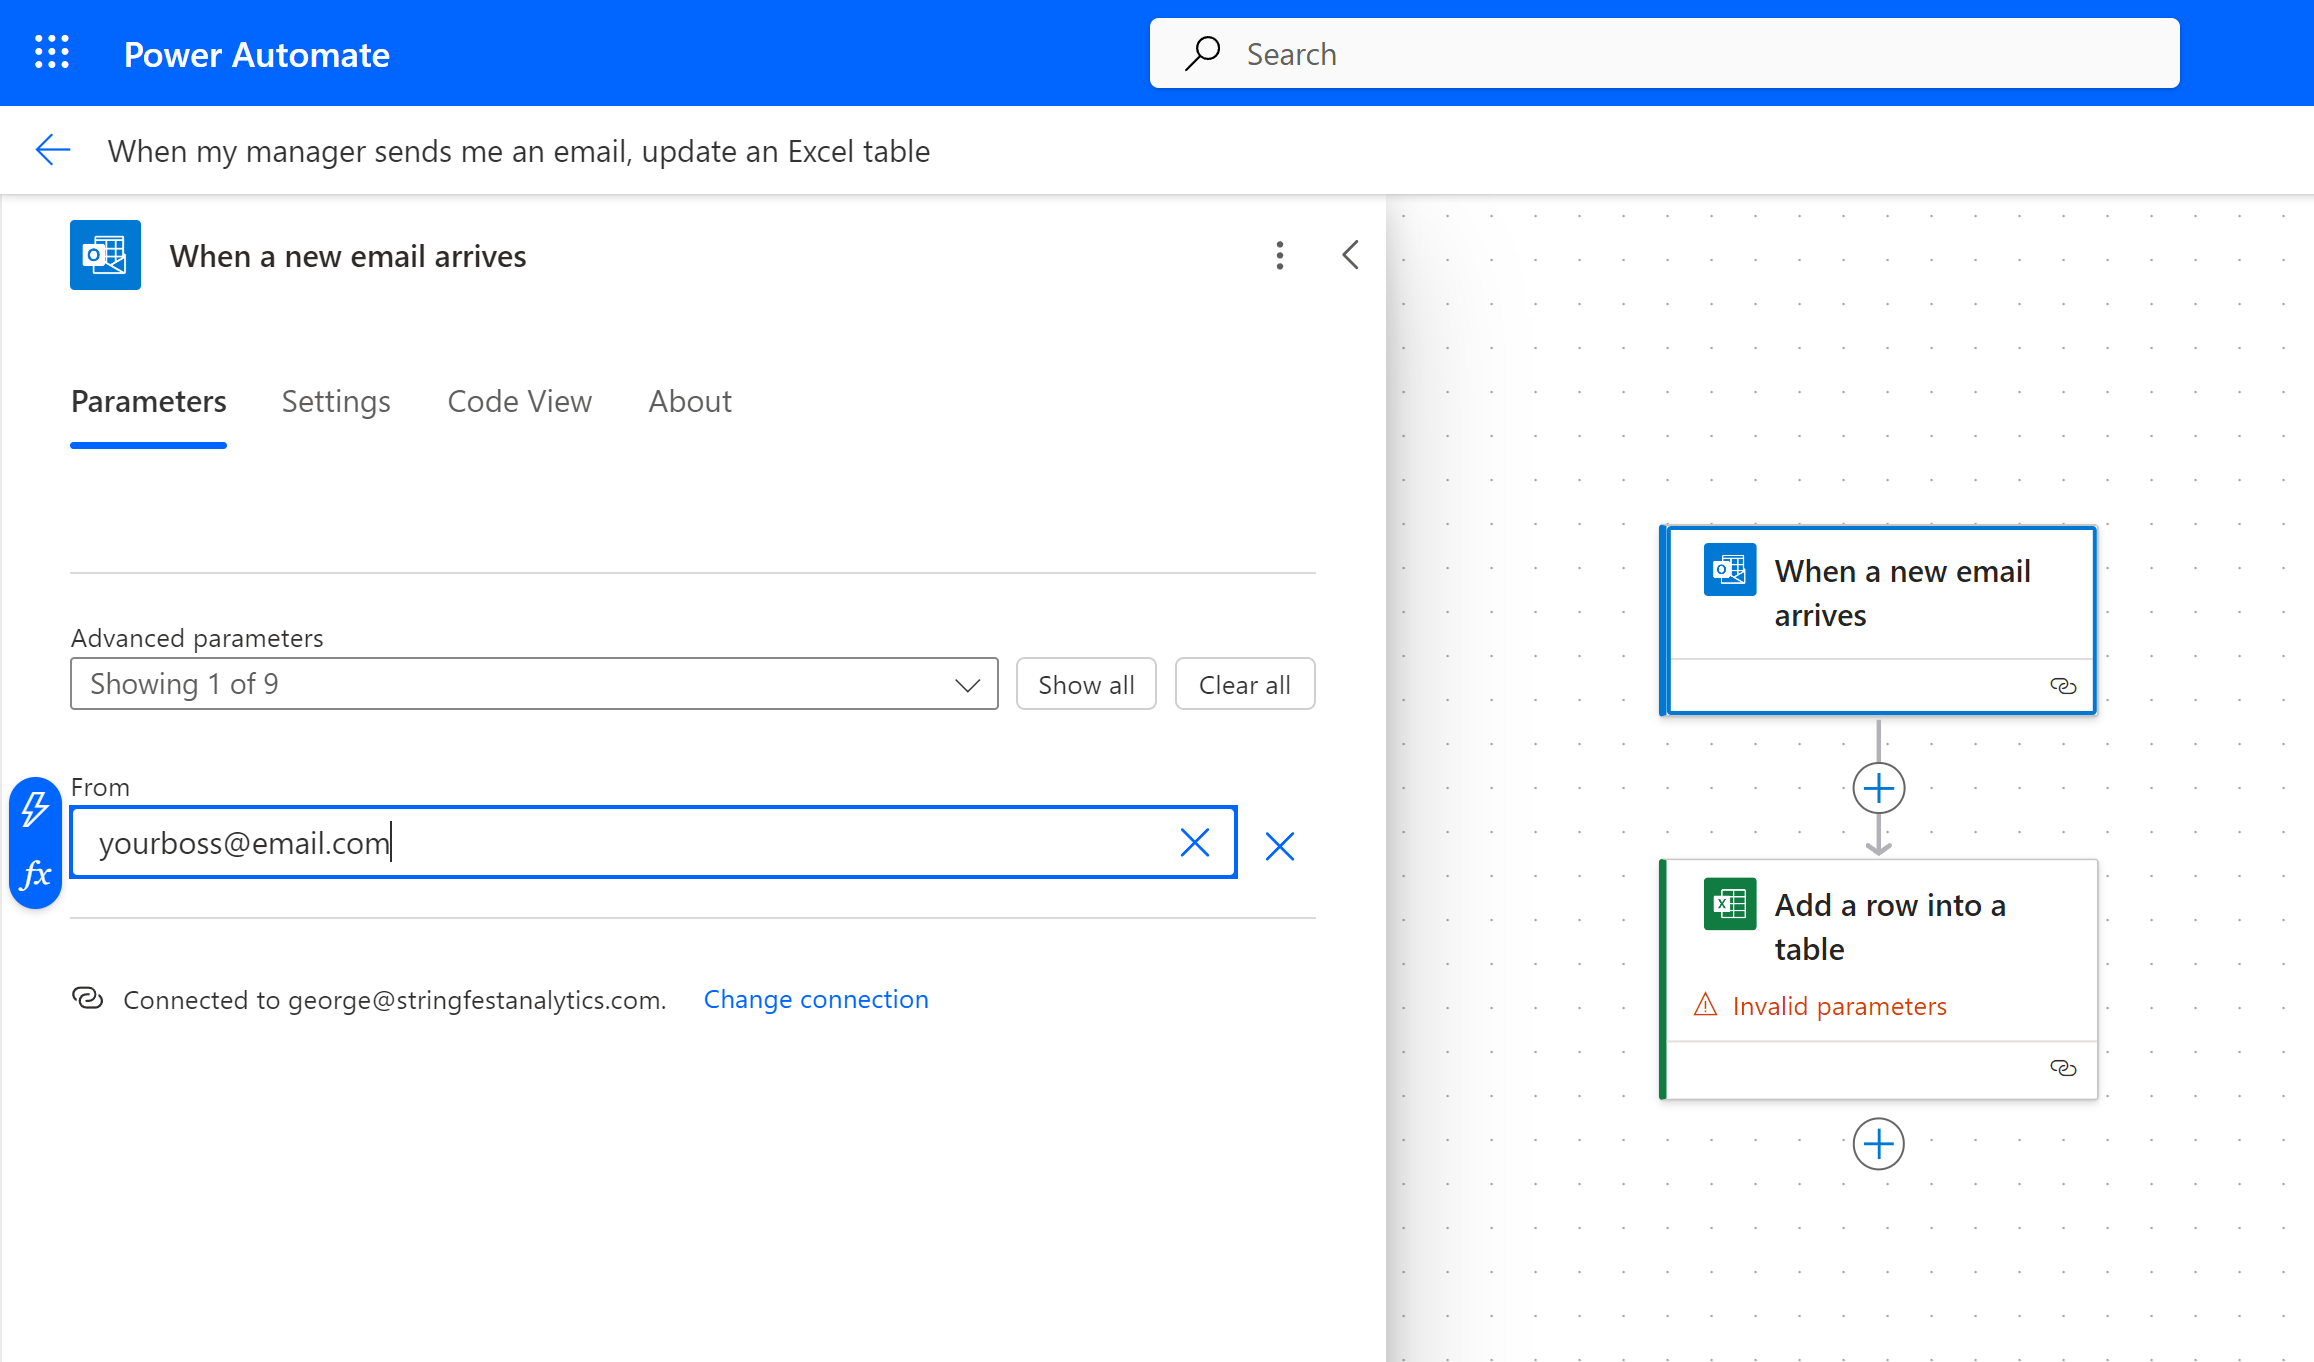
Above the “From” box in this parameter box, there’s an “Advanced parameters” section.
If you click on it, you’ll see numerous filters and constraints you can add to this flow. For instance, you might want the flow to run only if a specific email is CC’d, if the data has or lacks an attachment, and so forth. This allows you to create a custom set of parameters and further tailor your flows in Power Automate. Keep in mind that it’s all about defining the rules of the game and deciding what to automate. Power Automate can often handle the rest.

Next, we’ll set up the parameters for the Excel table. First, you’ll specify the location of the file, including its document library, file name, and table name.

Updating your Power Automate parameter options based on changes to Excel settings mid-process is not possible. For example, if you want to change the column names, rename the table, or make other adjustments, these updates will not reflect in Power Automate in real time. You will either need to start from scratch or save your flow and return to make corrections. Unfortunately, saving a draft in Power Automate is challenging because it requires the entire flow to be fully configured; you cannot save a partially designed flow, which can be quite frustrating.
Now that you have pinpointed the location of the file and table, it’s time to specify which columns to populate with data, and how. To do this, click on “Show all” under advanced parameters.

This will populate each column of your emails table as a box to be filled in, and now we have the opportunity to fill it in with preloaded data via Power Automate. Let’s get started with the Date column.
Because Power Automate has detected that one of these columns is a Date column, we have the additional option of specifying how to format these dates. Select ISO 8601 as this format will convert smoothly into an Excel workbook.

Next, we need to specify how to populate the columns of our table and determine the source of the data from a previous step in the flow. To do this, click on the lightning bolt icon to the right of your text box.

You will find several properties associated with any incoming email that can be used to populate the columns of the Excel workbook. Be sure to click on “See More” to view the entire set of options. For the Date column, “Received Time” seems to be a good choice.

Go ahead and select that option, and you’ll notice a blue Outlook icon and tag added to this column. You can continue along these lines by setting Subject to “Subject,” CC to “CC,” and Preview to “Body Preview.” We’ll leave the Notes column blank because we want to fill it in ourselves after reviewing the populated data.

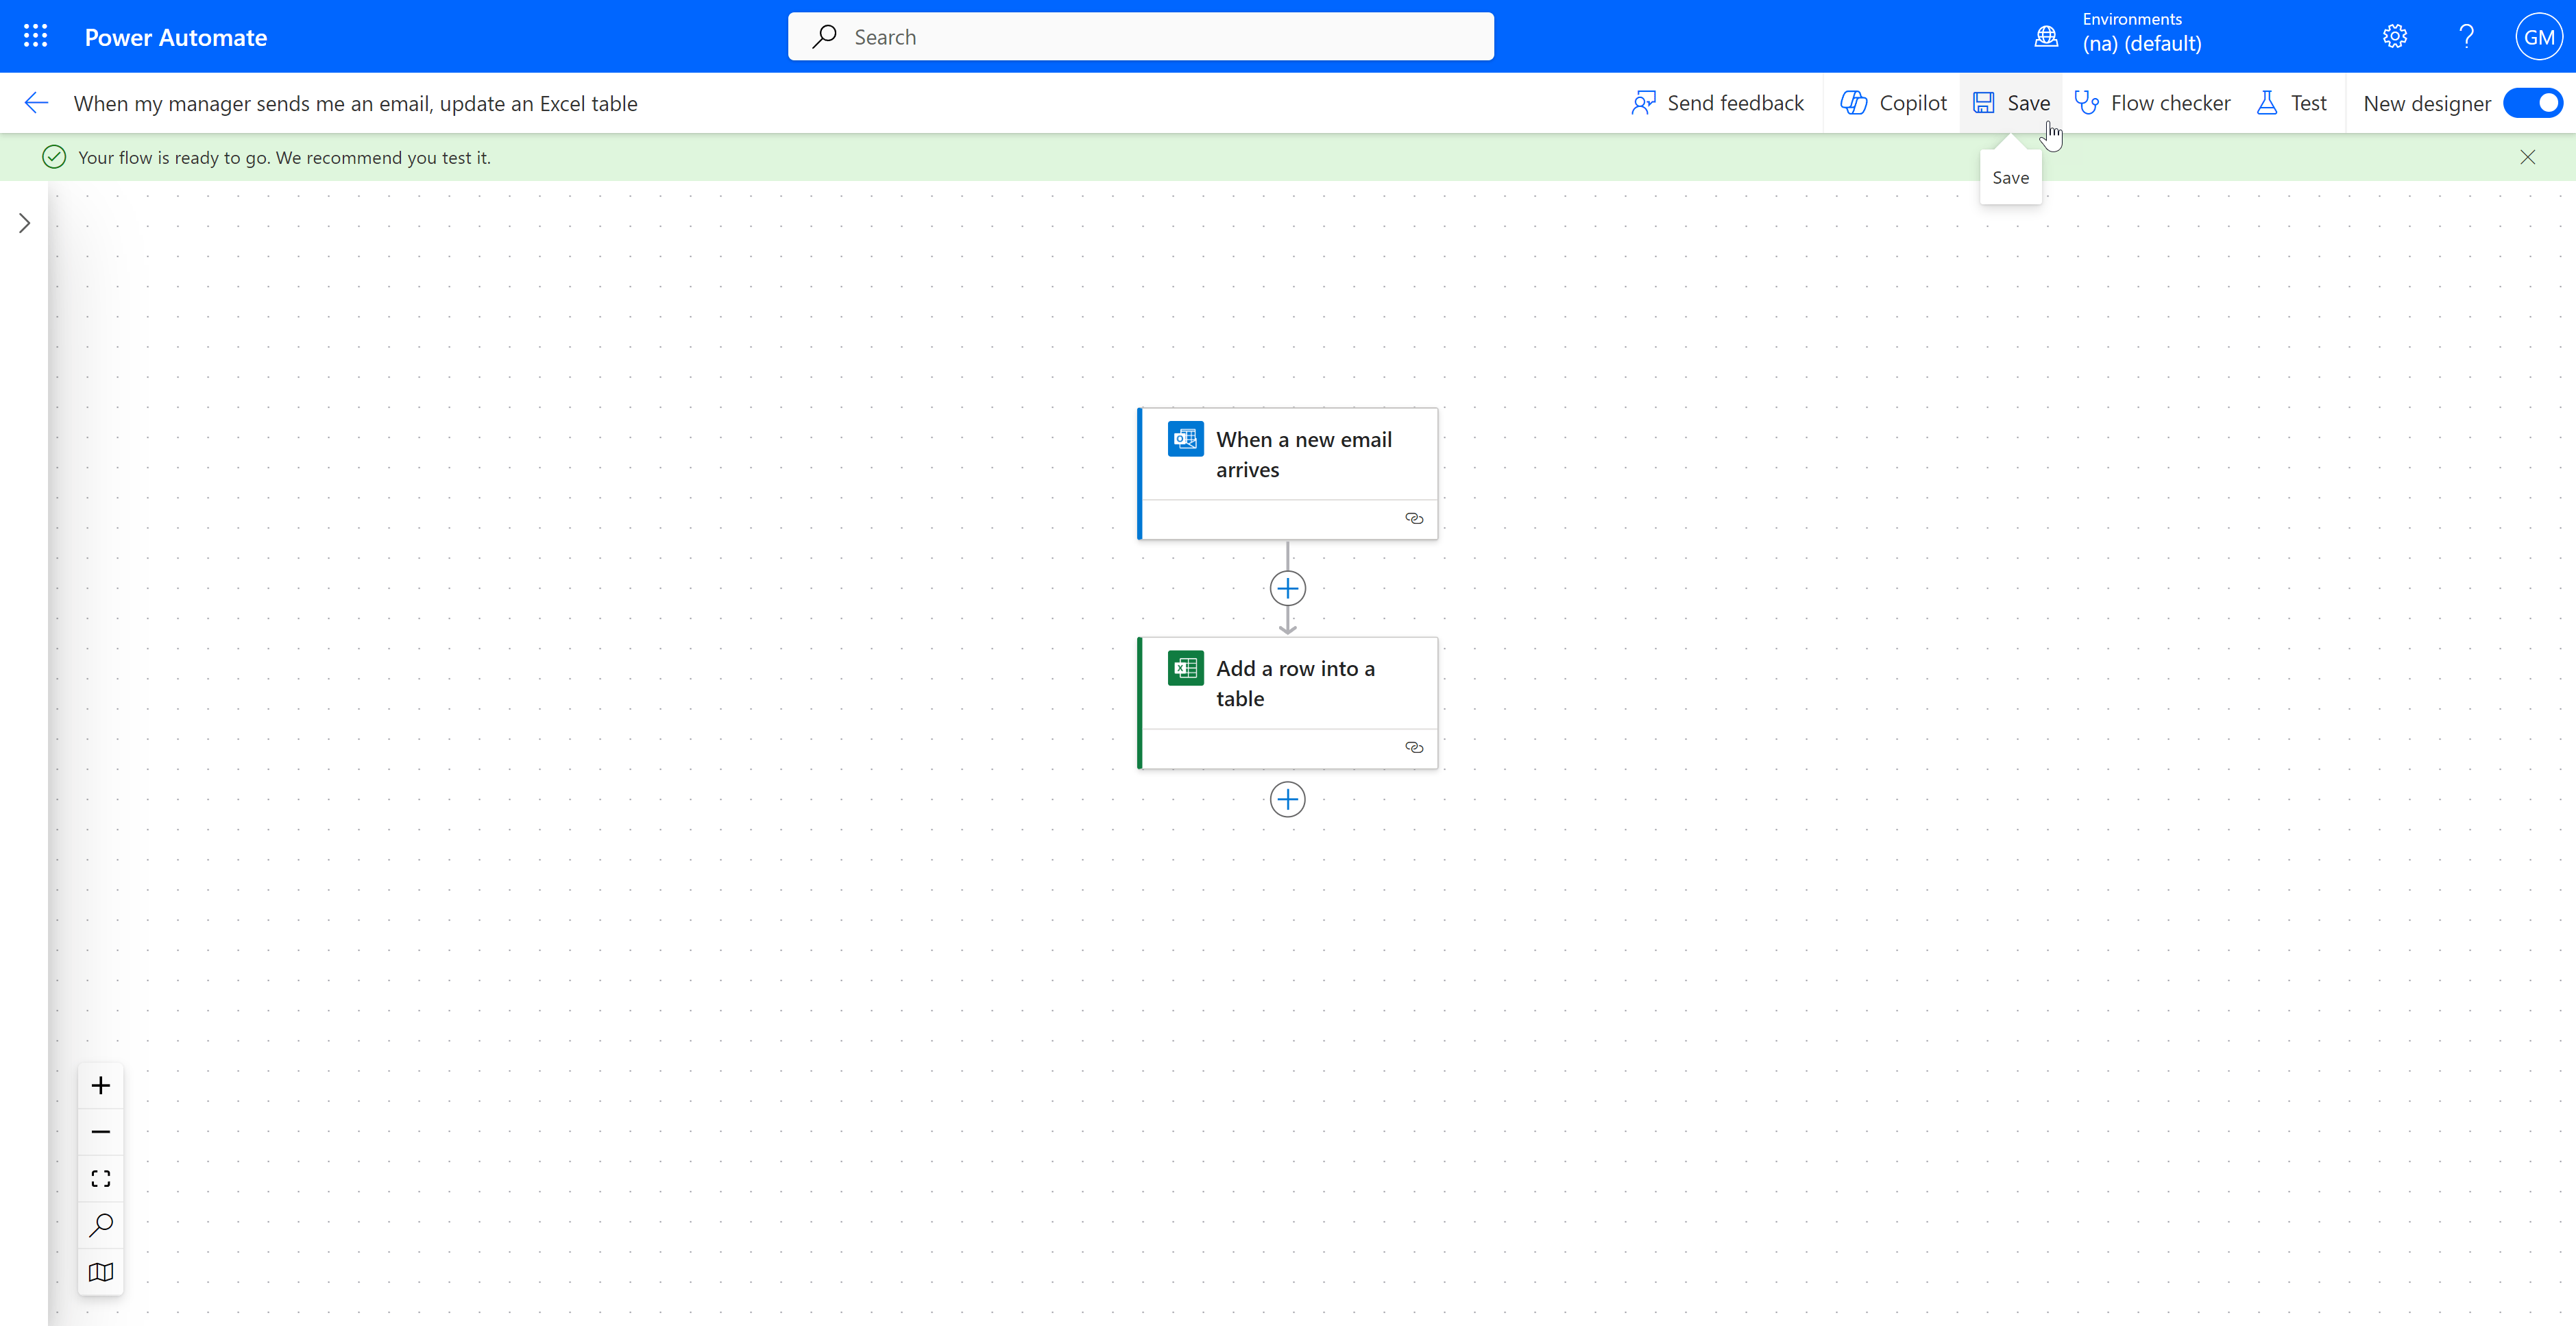
With the parameters of our flow defined, we will now go ahead and save this flow by clicking Save on the top menu.
Testing the email
Now comes the moment of truth—testing the email! As mentioned before, you could ask your boss to send you an email to see what happens. However, it’s unlikely any boss would appreciate being used as a test subject. A better approach would be to first test it with an email address you control, and then adjust the parameters to include your manager’s email. I’m going to try that myself and see what happens.
This flow will automatically run and should only take a few seconds to trigger and complete. If you need it to run on a delay or only check and update a certain number of times per day, you can adjust those settings in Power Automate.

How cool is that?! I see the email subject, the preview, and everything. I even added my own little congratulatory note in the Notes column of the table.
Even though this flow seems to be working now, make sure to monitor it regularly—anyone who has automated processes before knows that new exceptions and issues can arise unexpectedly.
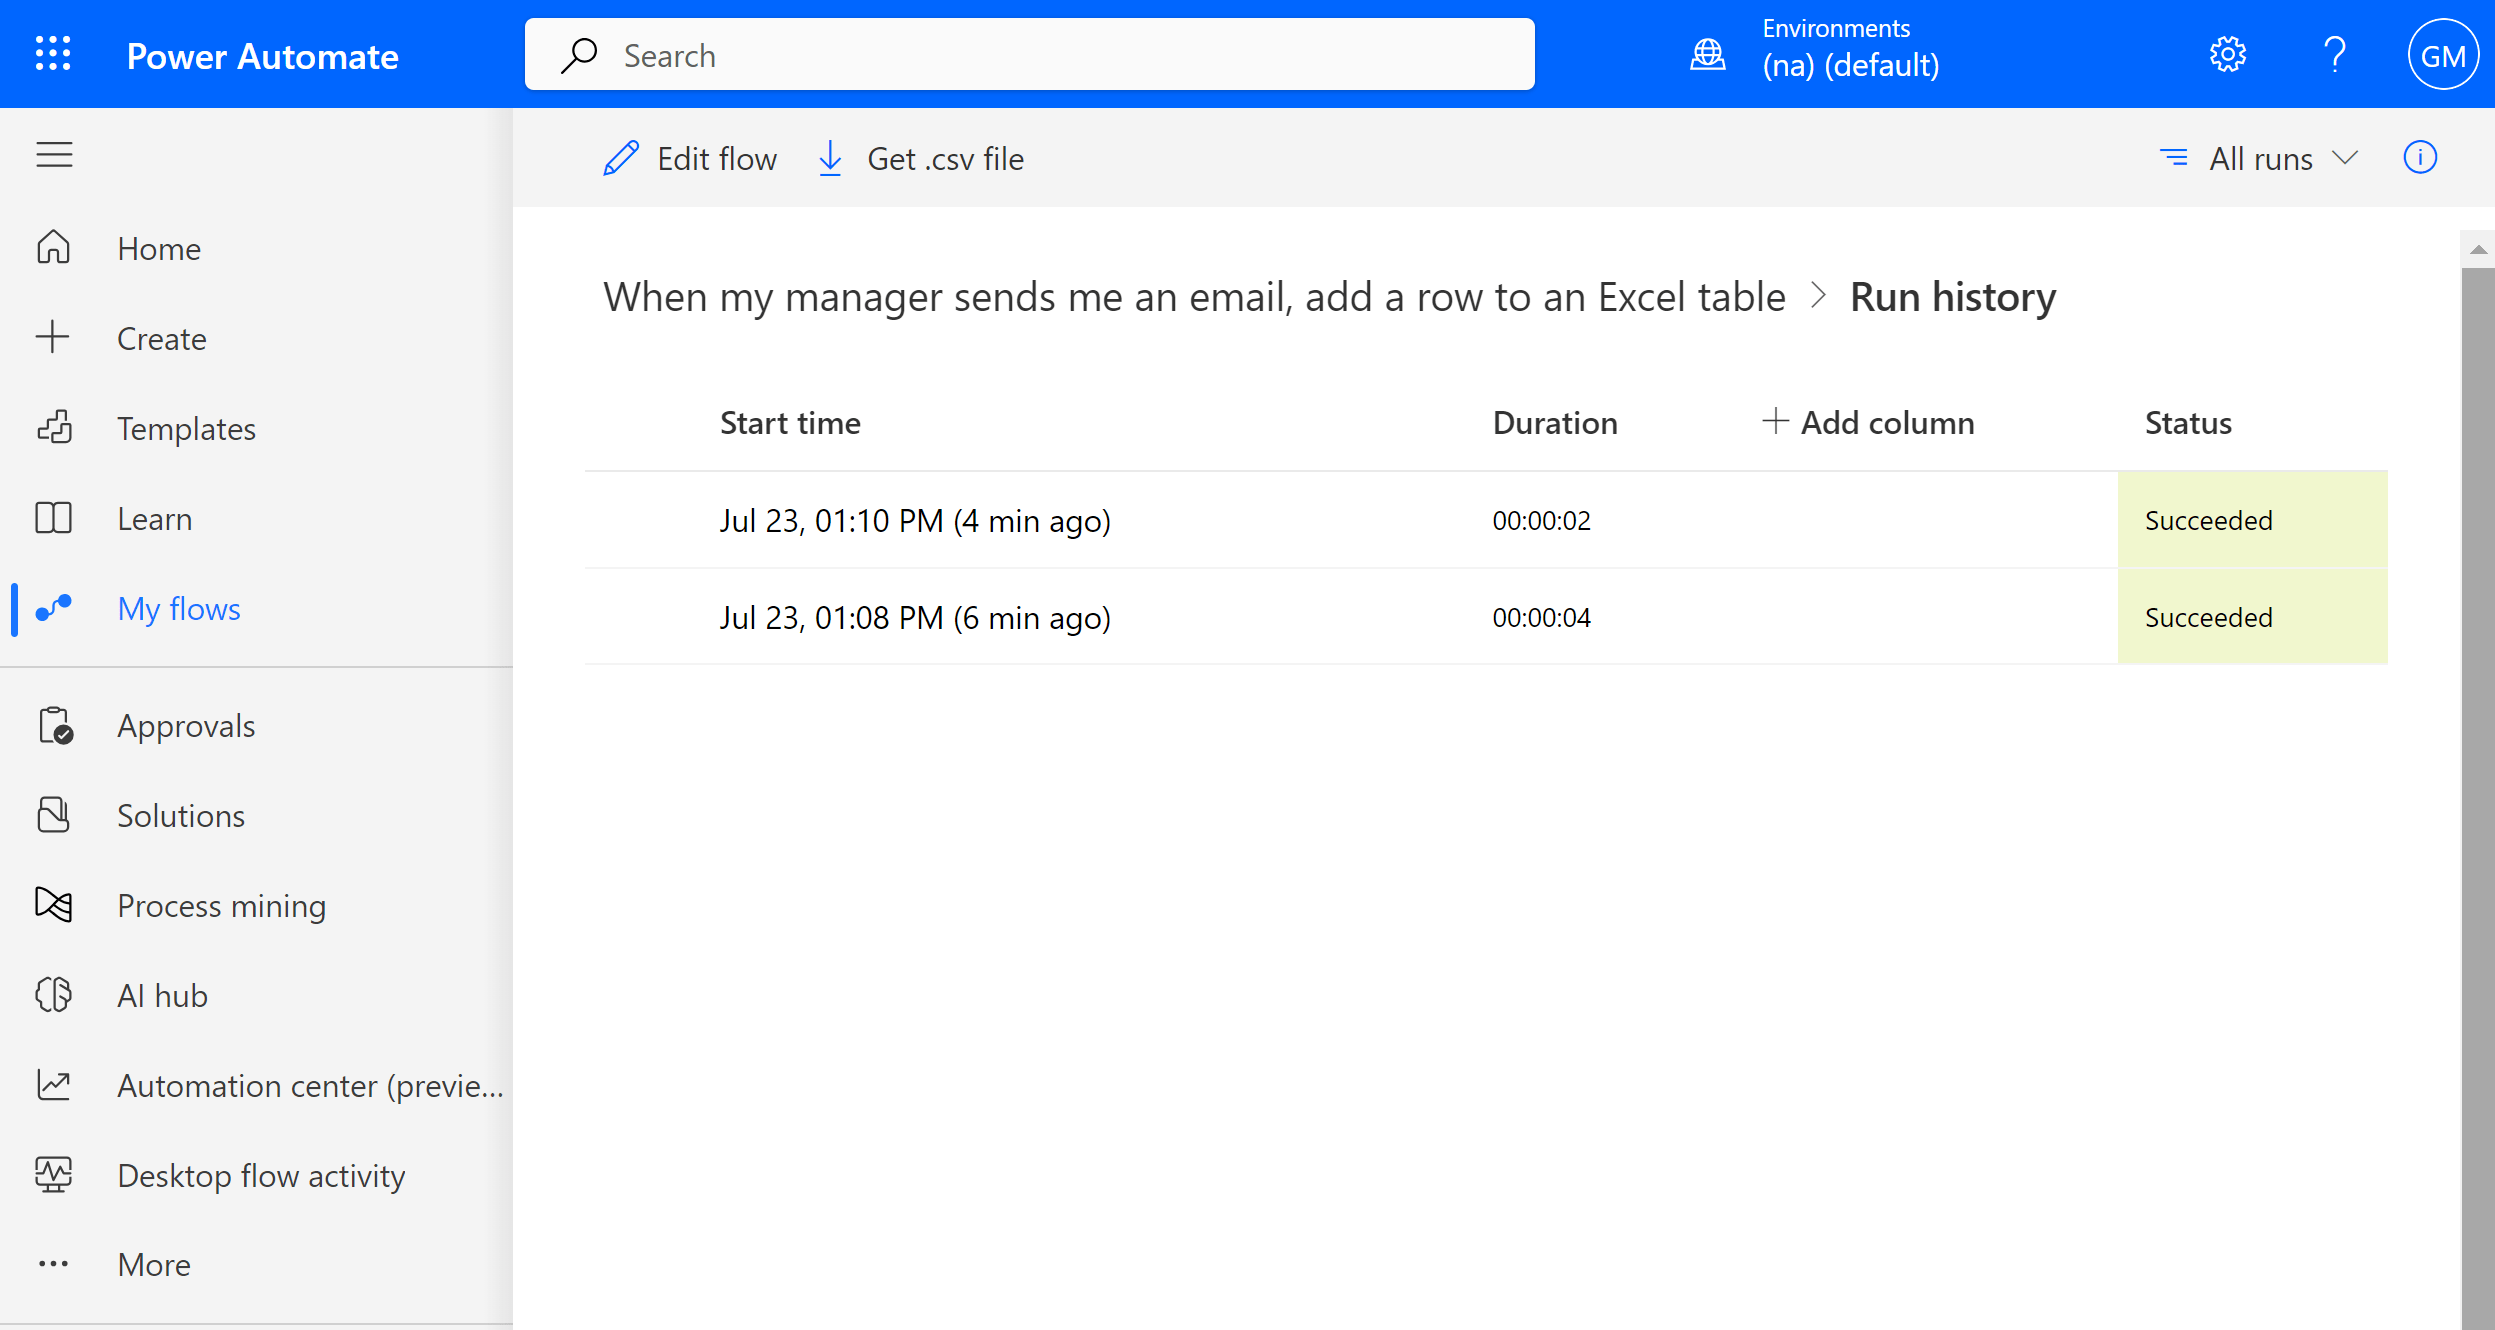
You can do this by returning to Power Automate, finding your flow under My Flows, and selecting “Run history.”

Your resulting run history will appear. The results may vary from mine, depending on how many times you’ve tested the flow and when.
Conclusion
In this post, you learned how to create a basic conditional flow to log all emails coming in from a specific address, such as your boss’s. There are definitely ways to build on and make this flow more complex. For example, you could filter emails by keywords or content to focus on relevant messages or create tasks in To Do based on what you populate in the Status column of your workbook. Or perhaps you would like to list out the emails that you have replied back to your boss. But for now, we’ll stop here and hope the idea of how Power Automate can help bring data in and out of Excel makes sense.
What questions do you have about task automation in Excel via Power Automate? Let me know in the comments.
