I liken Power Query to the Narnia of Power Query — a magical place, but not so easy to locate:
Here’s how to load your Excel data into Power Query…and an example what to do with it when you get there:
First, the Data tab
The first steps to Narnia, I mean Power Query, is to place your cursor anywhere inside the data, then go to Data > From Table/Range.

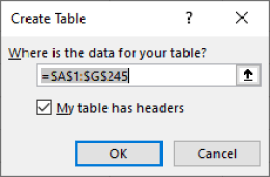
Once you click on this, a Create Table menu will appear. Go ahead and click OK:

Moral of the story: Power Query forces any Excel data that comes its way to be in a table first. That’s why it’s good to understand a bit about tables before you use Power Query.
A couple of clicks and congratulations, you’re in the Power Query editor, which should look something like this:

Now what?
I hope you can use this walkthrough as a jumping-off point into other tutorials. If you’re good at stopping here, you can back out of Power Query simply by selecting the X at the upper corner of the editor, then selecting Discard. You’ll be launched back to the original Excel worksheet, and you’ll see that the tips dataset is now a table.

Now that you know the secret location to Power Query, I hope you come back often!
What questions do you have about Power Query for Excel? Let me know in the comments.
