Copilot for Excel is poised to revolutionize your spreadsheet interactions, assuming you can navigate how to start it! This post aims to address some common challenges in importing datasets into Copilot.
It’s important to note that, as of this writing, Copilot is exclusively available for enterprise licenses, with no current timeline announced for a broader rollout to general consumers and small businesses.
Should you have access to Copilot and wish to follow this guide, please start by opening a blank Excel workbook.
Finding Copilot
Copilot is located at the far right of the Home tab of the ribbon, next to Analyze Data:

The “Analyze Data” feature in Excel, a precursor to Copilot, encompasses numerous functionalities now integrated into Copilot. If you haven’t used it, I strongly recommend familiarizing yourself with it before diving into Copilot. Doing so offers a simpler environment to experiment with natural language querying and discerning valuable insights from Excel’s AI-generated results. For an introduction to Analyze Data, check out this blog post:
A key point emphasized in these resources is the necessity of well-structured, clean data for maximizing AI’s potential. Computers often struggle to interpret the inherent meaning of data columns, and adhering to certain data organization principles can significantly enhance the AI’s ability to understand your data as intended. Familiarizing yourself with these data tidying principles is crucial before engaging with Copilot.
Now, focusing on Copilot: it appears that, even if you are prepared to use it, you might encounter an issue with the feature being grayed out. To resolve this and activate Copilot for the first time, here are several steps to consider.
The workbook must be saved to OneDrive or Sharepoint
First, it’s essential to save your workbook either on OneDrive or SharePoint. Importantly, ensure that it’s saved under the account associated with your Copilot license. This step is crucial because saving the workbook to your local computer, an external drive, or using another cloud service like Google Drive or Dropbox will not suffice for Copilot functionality.
The data of interest must be stored as a table
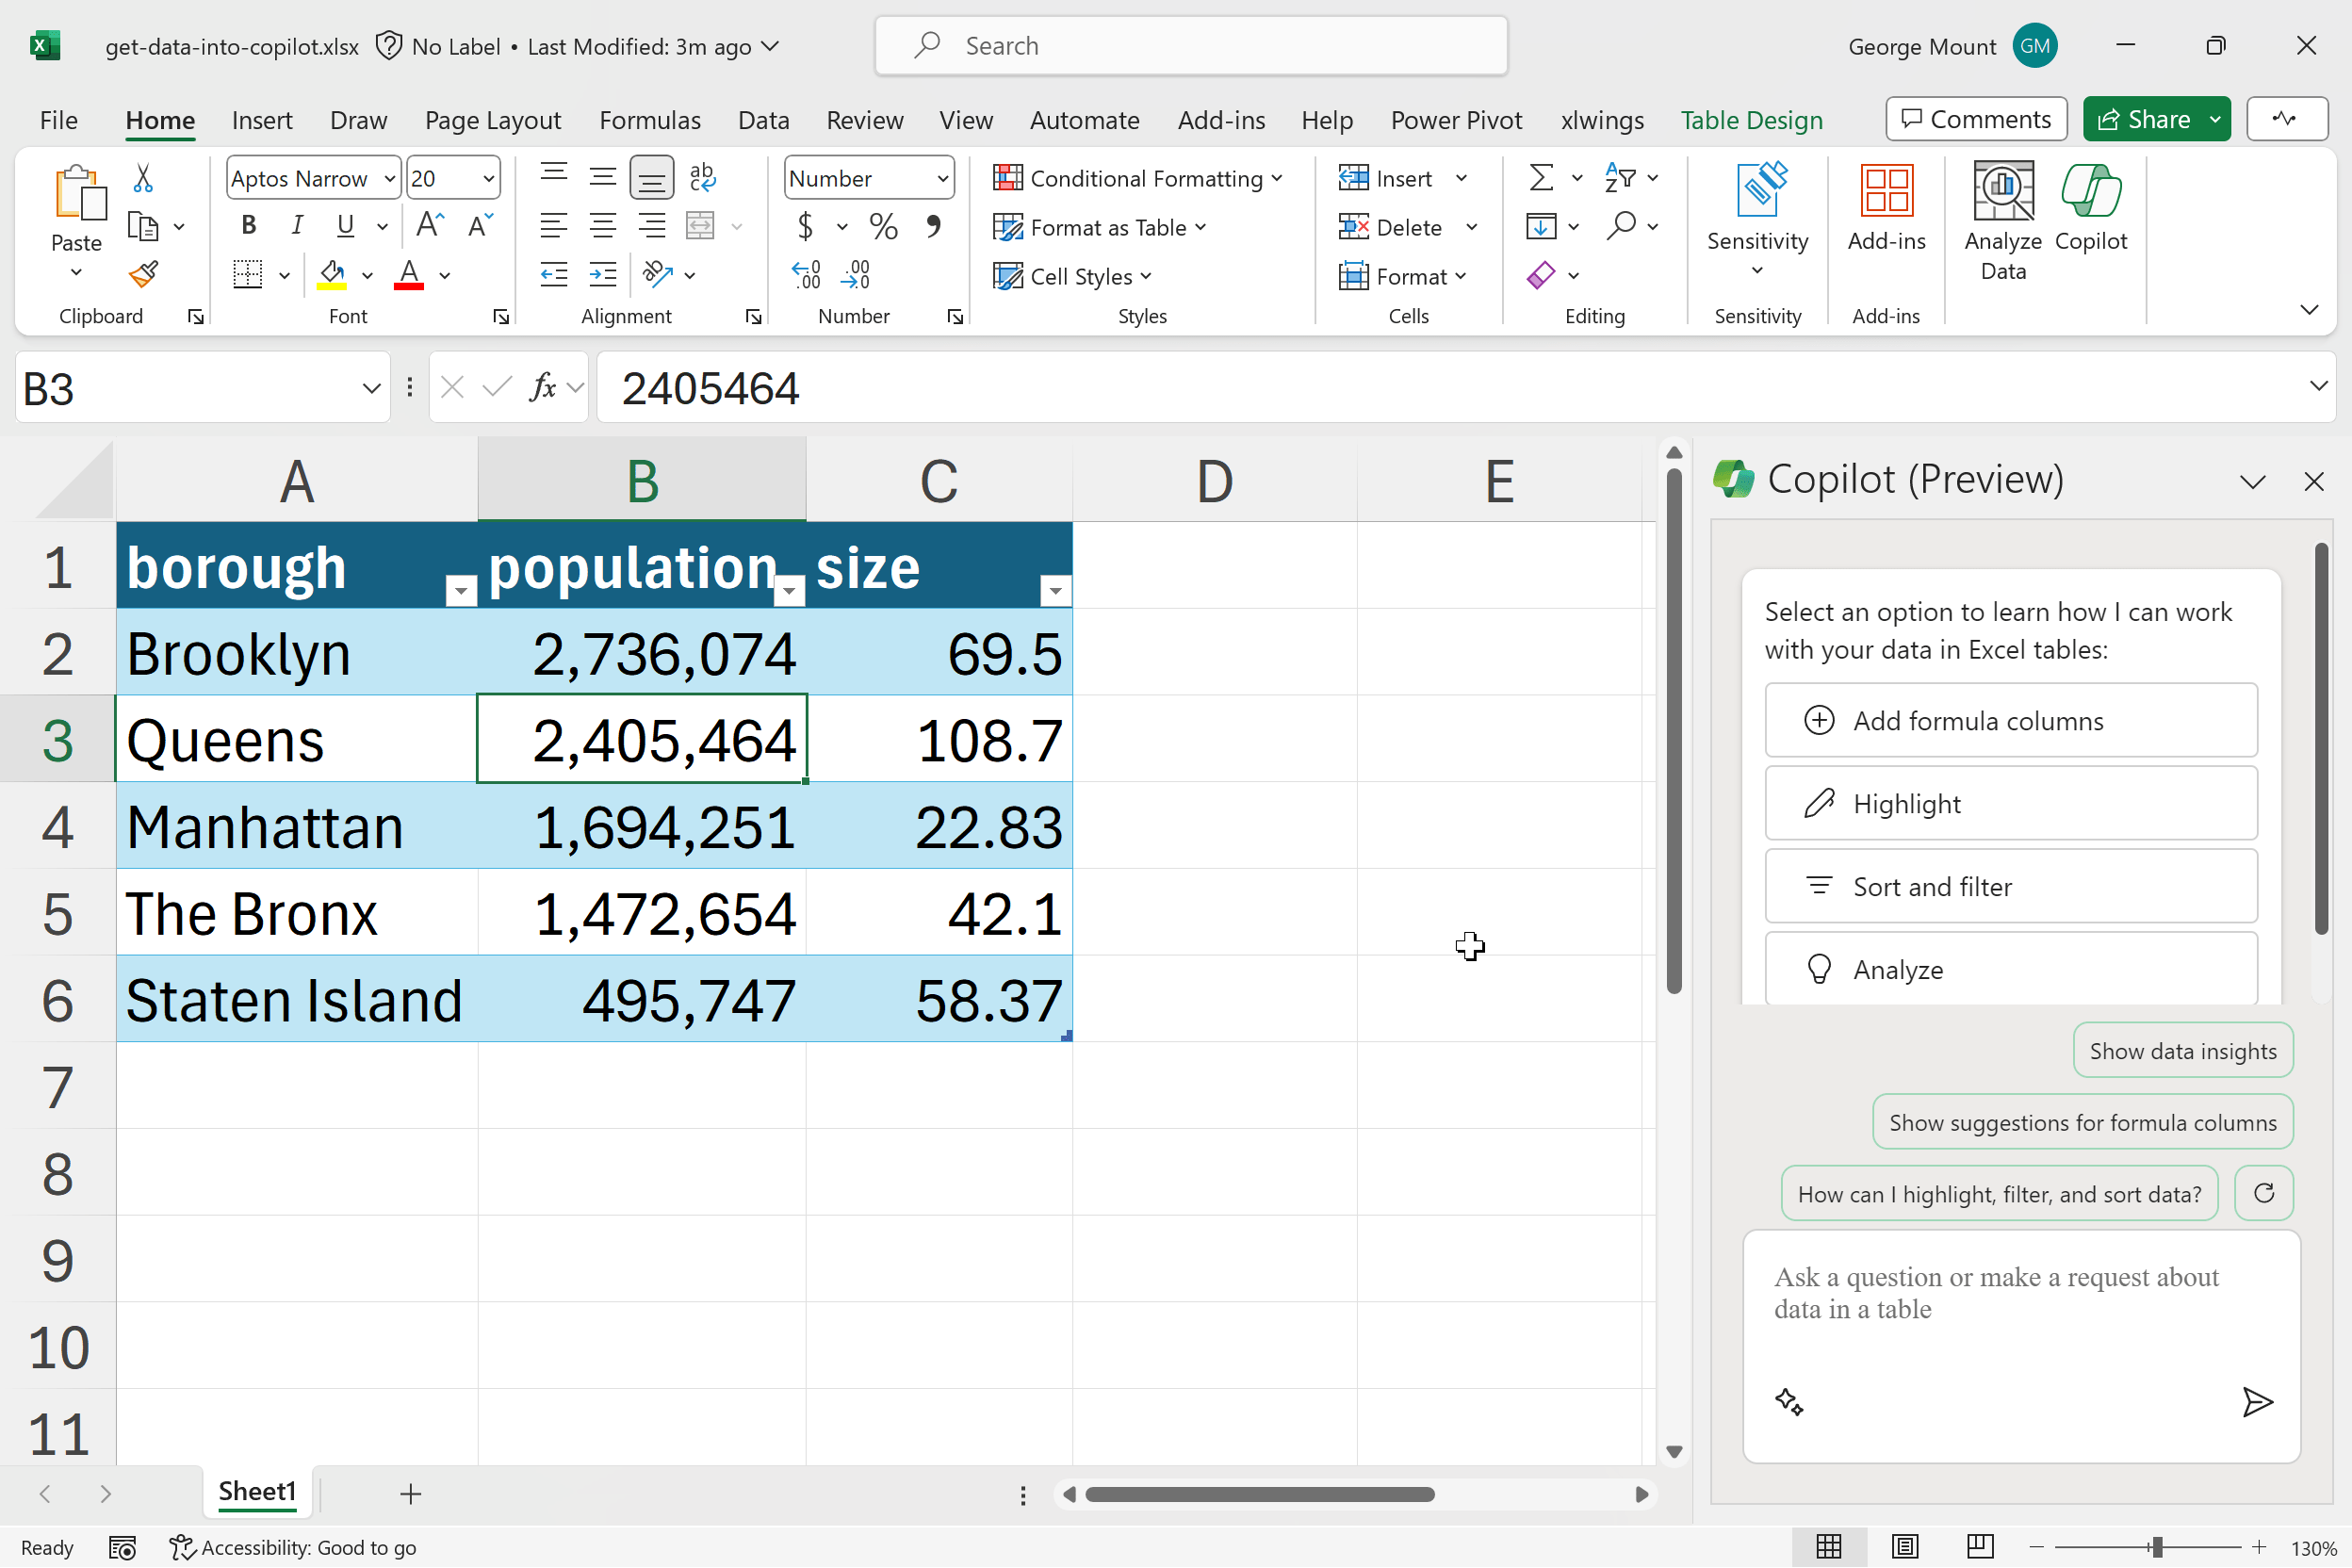
As of now, Copilot operates exclusively on data contained within a single table at a time. To illustrate this, add some data to your workbook. For a starting point, consider using a small dataset, like the land area and population of New York City’s five boroughs as of the current date. Feel free to paste this dataset into your workbook for further exploration with Copilot:
| borough | population | size |
|---|---|---|
| Brooklyn | 2,736,074 | 69.5 |
| Queens | 2,405,464 | 108.7 |
| Manhattan | 1,694,251 | 22.83 |
| The Bronx | 1,472,654 | 42.1 |
| Staten Island | 495,747 | 58.37 |
Just having the data in your workbook isn’t sufficient for Copilot’s use; it must be formatted as a table. There are various methods to accomplish this, but one efficient way is to use the keyboard shortcut Ctrl + L:

Unfortunately, even after these steps, Copilot remains inactive and is still grayed out. What could be the reason?
Turning on AutoSave
If you have converted your data into a table and selected it with your mouse, saved the file to OneDrive or SharePoint, but are still encountering issues with Copilot, it’s likely that you need to enable AutoSave in the workbook.
Look for a small toggle button labeled AutoSave at the top of your workbook. Ensure that this is switched on. Once activated, you’ll notice Copilot becomes immediately responsive. Success!

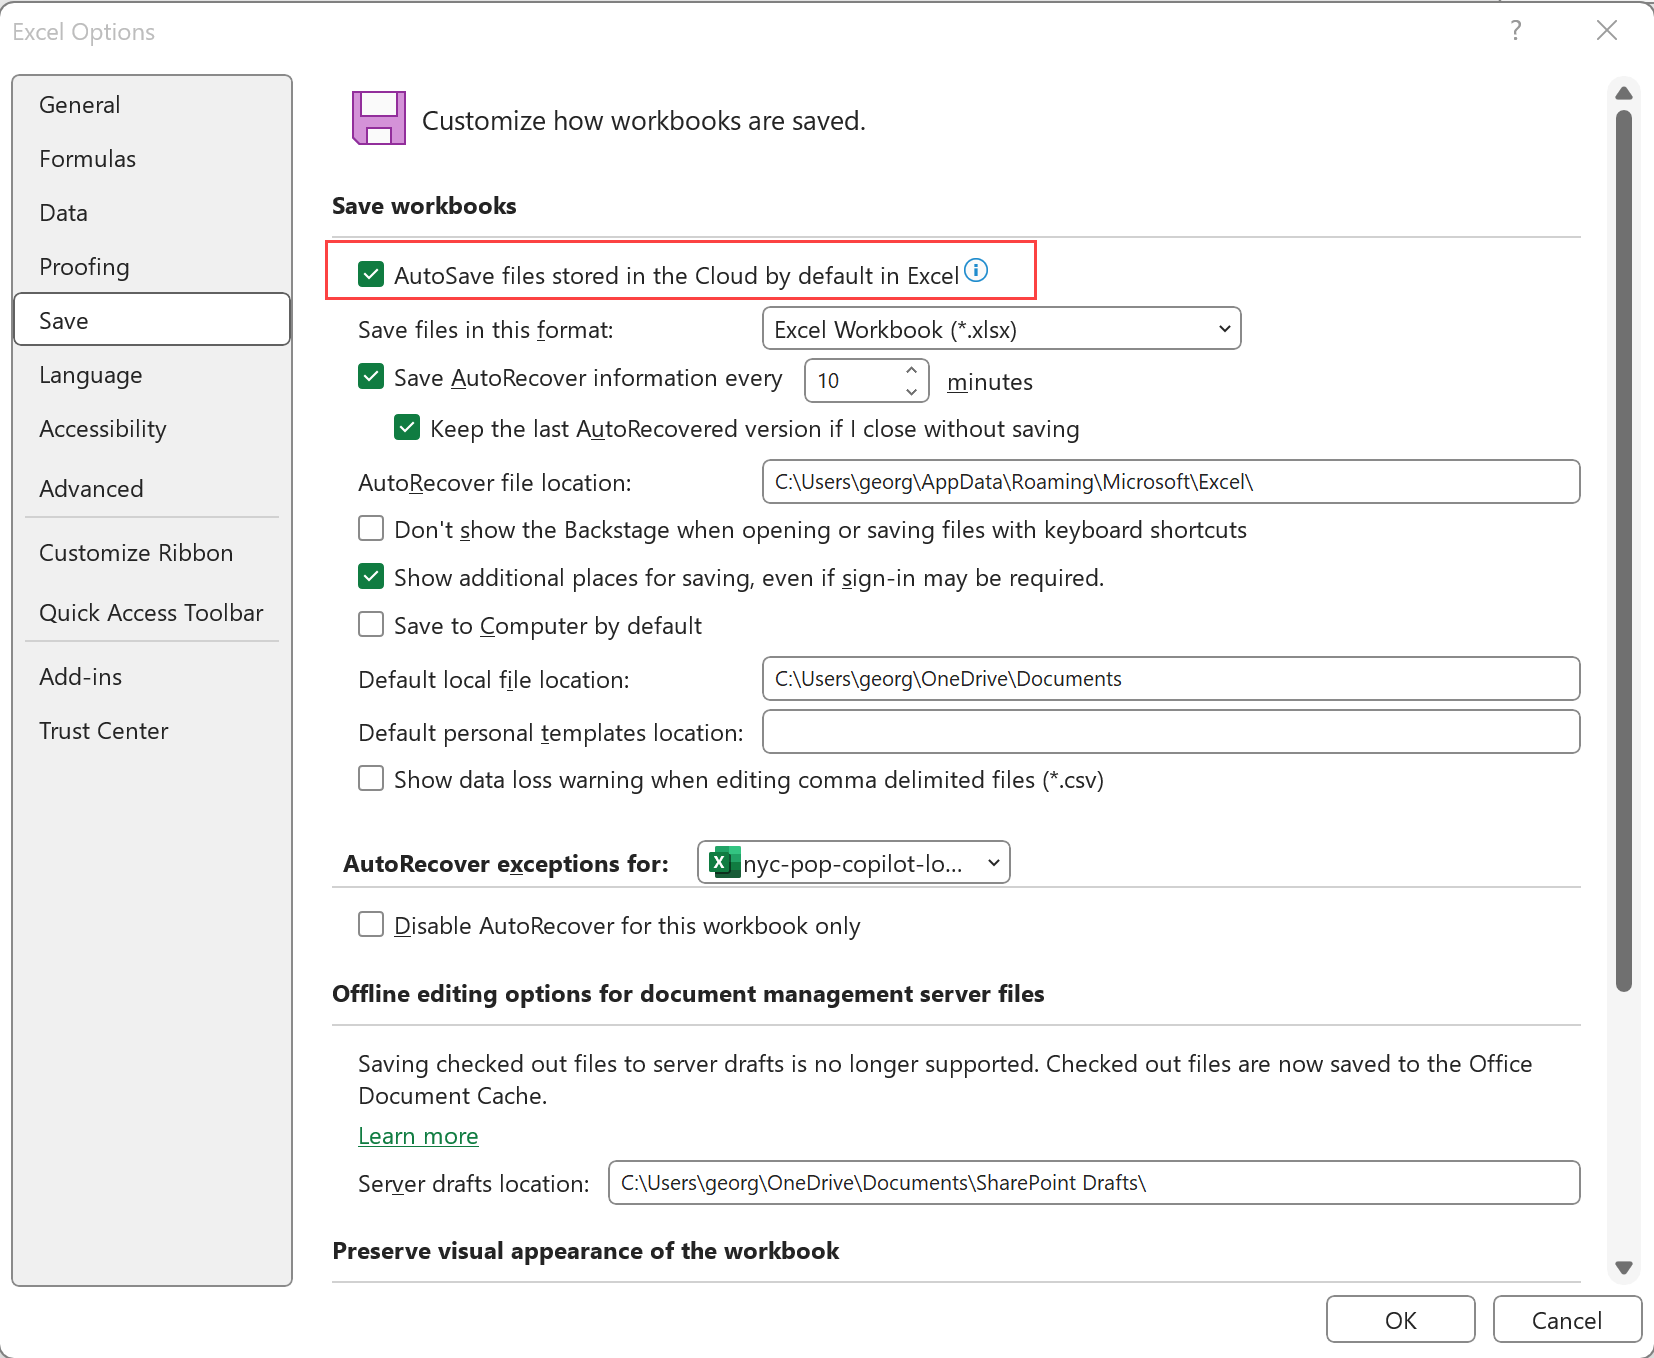
If the AutoSave toggle isn’t visible, navigate to File > Options > Save to verify that it is set as the default for your files.

Try restarting Excel
If you’ve met all the specified conditions but still find Copilot appearing grayed out, it’s time to heed the advice of IT technicians everywhere: try restarting your Excel program. I’ve observed that particularly after enabling AutoSave or saving to the correct cloud location, a new session might be necessary to get everything functioning correctly.
Assuming you’ve followed these steps successfully, you should now see a Copilot menu positioned to the right of your data.

Copilot provides a sidebar menu with tools designed to assist you in analyzing and understanding your Excel tables. These features range from applying conditional formatting to generating visualizations. In a future post, we will delve into the basics of getting started with Copilot.
Conclusion
The introduction of Copilot represents a groundbreaking advancement in how we utilize Excel, making its slightly unconventional startup process less surprising. As this technology matures and becomes more widely adopted, it’s likely to integrate seamlessly into our daily workflows, much like the keyboard shortcuts we’re already accustomed to.
Do you have any questions about preparing a dataset for use in Copilot? Please feel free to share them in the comments. I also recommend visiting the official FAQ page for Copilot in Excel. There, you can gain deeper insights into how the product functions and learn the essentials of getting started with it.
