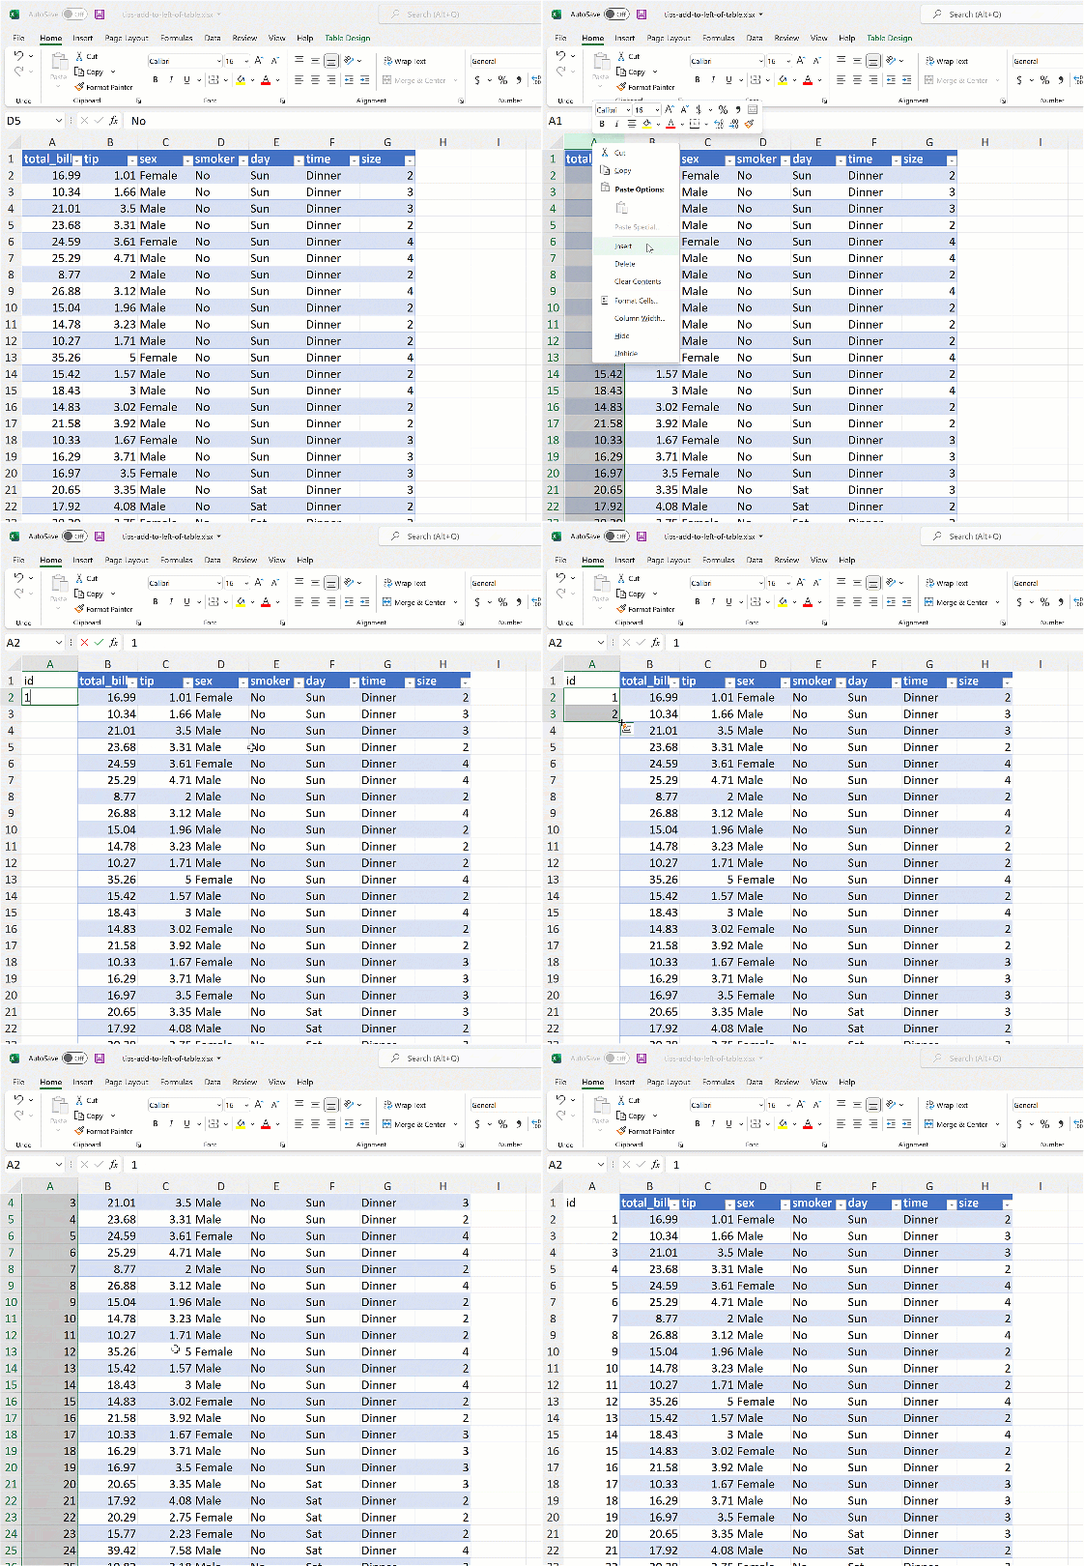
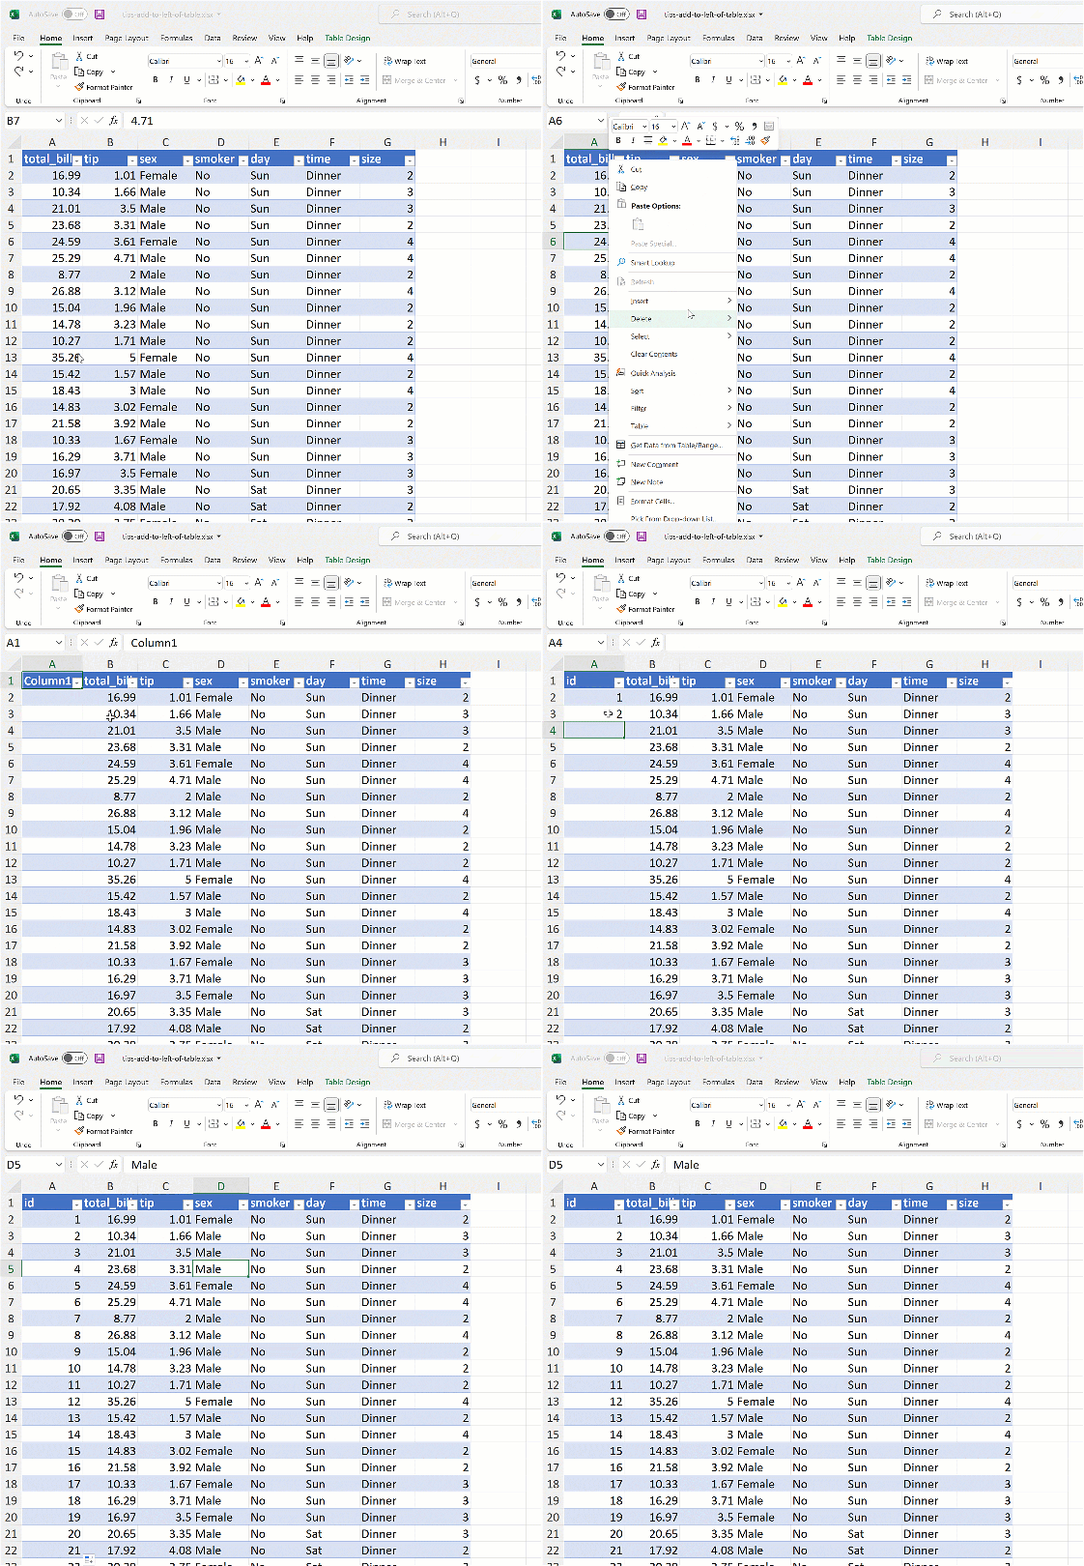
This is something that happens to me all the time: I’ve got data in an Excel table and want to add an index column (because I believe every dataset should have an index column). Index columns typically come first in a dataset, which means adding data to the left of the table.
But here’s the thing: Excel tables don’t add data to the left so good.

Here’s what I mean and how to get around it. Download the exercise file below to follow along.
Here we have a set of restaurant transactions; I would like to add an index column id to the left of the data.

id to this dataset (download here)Let’s take a look at adding this unique identifier to the dataset a few different ways.
Adding data to the right of a table is easy…
The first, easier option is to add data to the right of the table. All you have to do is start typing! The table will automatically include your new column as part of the table.
Because we’re making an index column in this case, we can even use Flash Fill to quickly populate its contents.

But what about adding data to the left of the column? Index columns are generally over in this part of the table.
Unfortunately, adding data here is a little bit trickier, but nothing we can’t handle.
Adding data to the left is trickier
If you insert a column to the left of the table and start typing… no dice. The data does not become part of the table.

What are the workarounds?
Like with most things in Excel, there are several ways to get around this. Here are three options. If you have another, let us know in the comments.
1. Cut and paste the column
This one may be the most straightforward: simply select the id column right of the table, right-click to cut, then right-click on the current first column and select Insert Cut Cells:

This works well if the column has already been created inside the table and you simply want to relocate it.
2. Resize table
Here’s another possibility: the column you want to add is already created and placed to the left of the table, you just want to extend the table over to include it.
In this case, click anywhere in the table and select Table Design > Resize Table and change the formula reference to include the relevant column.

3. Right-click to add to the left
Maybe you just want to create the leftward column first, and then add the data? Here’s how to do that: right click any cell in the current leftward-most column, then select Insert > Table Columns to the Left. From here, you have a column ready to use.

Recap
While it’s not quite as simple to add data to the left of a table as it is to the right, there are still some options:
- Once the column has been created inside the table, cut and paste it to the left
- If the column has been created outside of the table, move it to the left of the table and resize the table to include it
- If the column has not been created yet (inside or outside of the table), right-click on the table to add a column to the left.
Tables, the bridge to Power Query
Tables in and of themselves are a powerful tool for data management and analysis. But on top of that, they also serve as the gateway to that magical oasis of data cleaning known as Power Query. Is your team using Power Query for Excel data cleaning and reporting yet? Get started with my Click-and-clean data in Excel Power Query workshop:
How are you using tables now? Which method makes the most sense to you for adding data to the left? Let me know in the comments.
